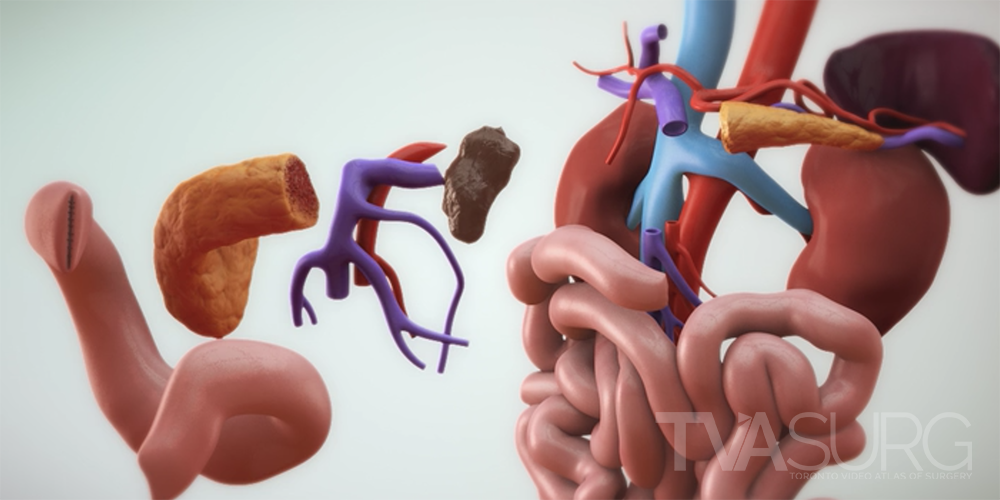
One of the key features of TVASurg videos, that sets them apart from most of the other educational surgery videos available online, is our 3D animations. As graduates of the esteemed Biomedical Communications program at the University of Toronto–Mississauga, the TVASurg production team is armed with a complete 3D animation skill set–modelling, rigging, shading, texturing, animation, lighting, rendering and compositing.
In studios that produce work for the movie industry, and in larger medical animation studios, often these tasks are delegated amongst large teams to individual specialists. In smaller niche studios like TVASurg, each team member has their strengths in particular components of the pipeline, but each of us are generalists in terms of 3D production, so all of us are well-versed in 3D modelling. Our specialization lay not in our technical skills, but rather in our ability to help surgeons teach–we communicate complex medical procedures using the most appropriate means available.
We’d like to share some of our insights into the core components of our production process that have allowed us to generate a growing library of 3D animation-enhanced educational surgery videos. While there are many medical 3D animations which depict esoteric biological molecules deep within the human body, cutting edge medical technology such as innovative surgical instruments, and even medical-legal videos that depict surgical procedures for lay audiences, there are few resources available today which provide high quality 3D animation medical videos for surgical education at the fellowship level, available on an open source platform.
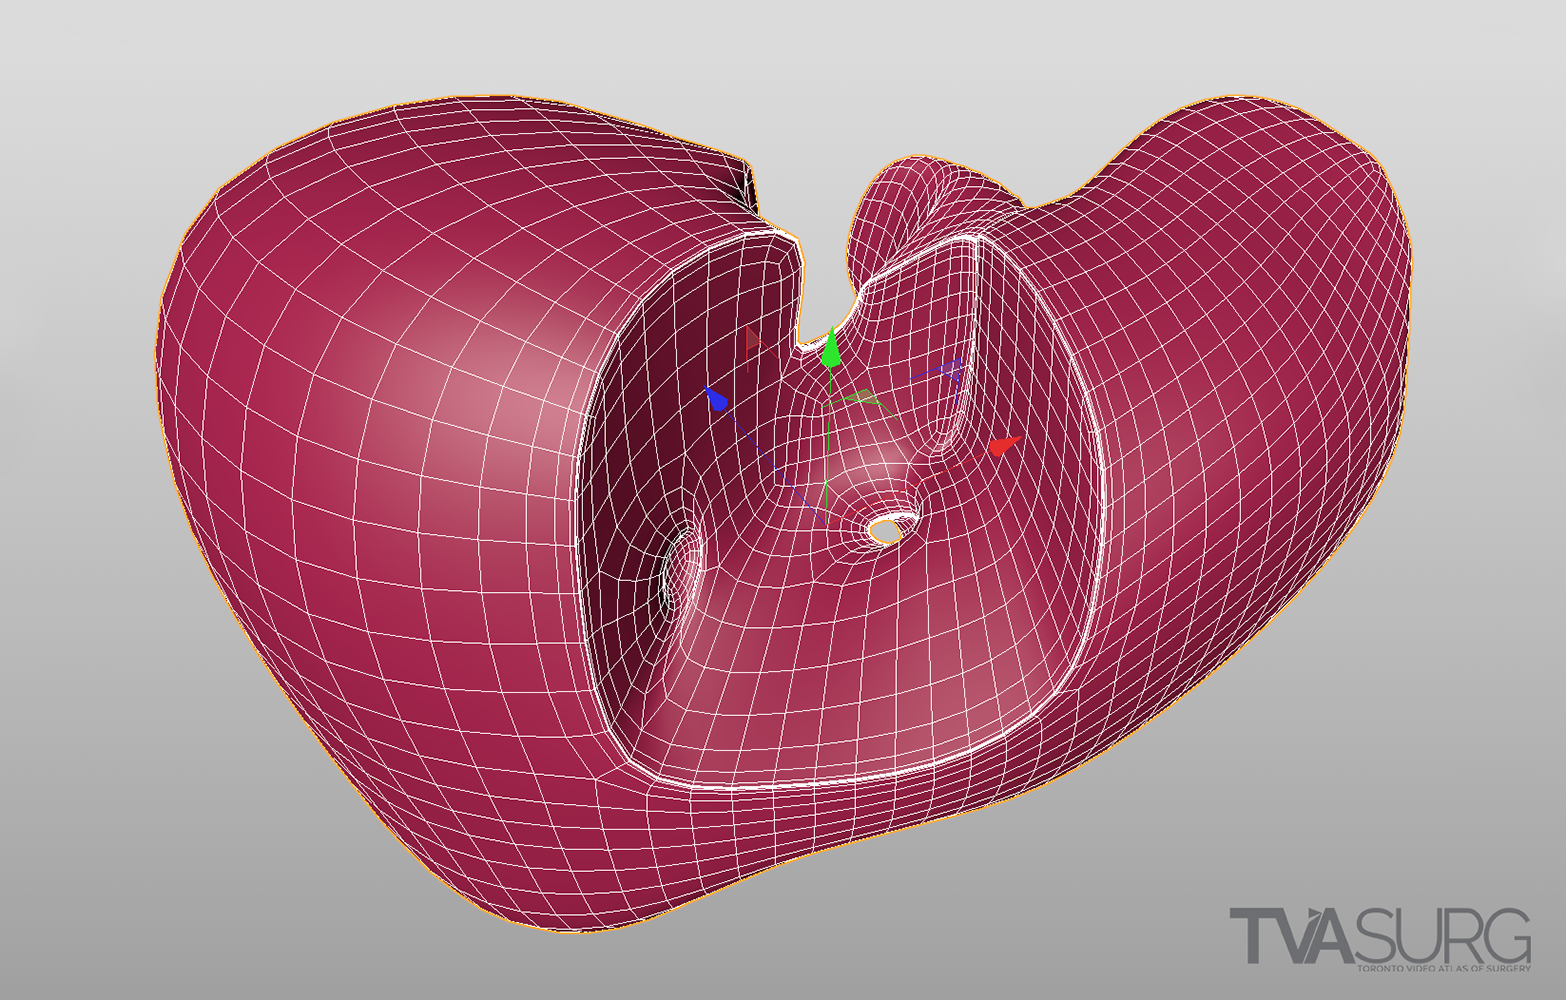
Special considerations are made for models used to teach specific surgical procedures. This resected liver model from our segment 4a/8 resection video is a perfect example.
Surgeons by necessity must think visually, in three dimensions, but also across time. At TVASurg, we have been given the privilege to illustrate 4-dimensional planning and execution in a medium that translates the surgeon's experience into a concise narrative. The communication between medical experts and medical illustrators is a flame that forges powerful visualizations.
STARTING STRONG: MEDICAL IMAGING RECONSTRUCTIONS
We produce new models for almost every video on the Atlas, as different procedures focus on different structures, and there can be anatomical variation between individuals. The model construction phase is where a lot of our discussions around anatomy are focused when meeting with our surgeon experts. Our first objective will be to make a list of all the anatomical structures necessary to tell the story of the case, identified during the surgical script development. We’ll want to know if there are contrast studies we can utilize to reconstruct certain structures that otherwise don’t show up well, or if there are any structures we have to reconstruct “from scratch”.
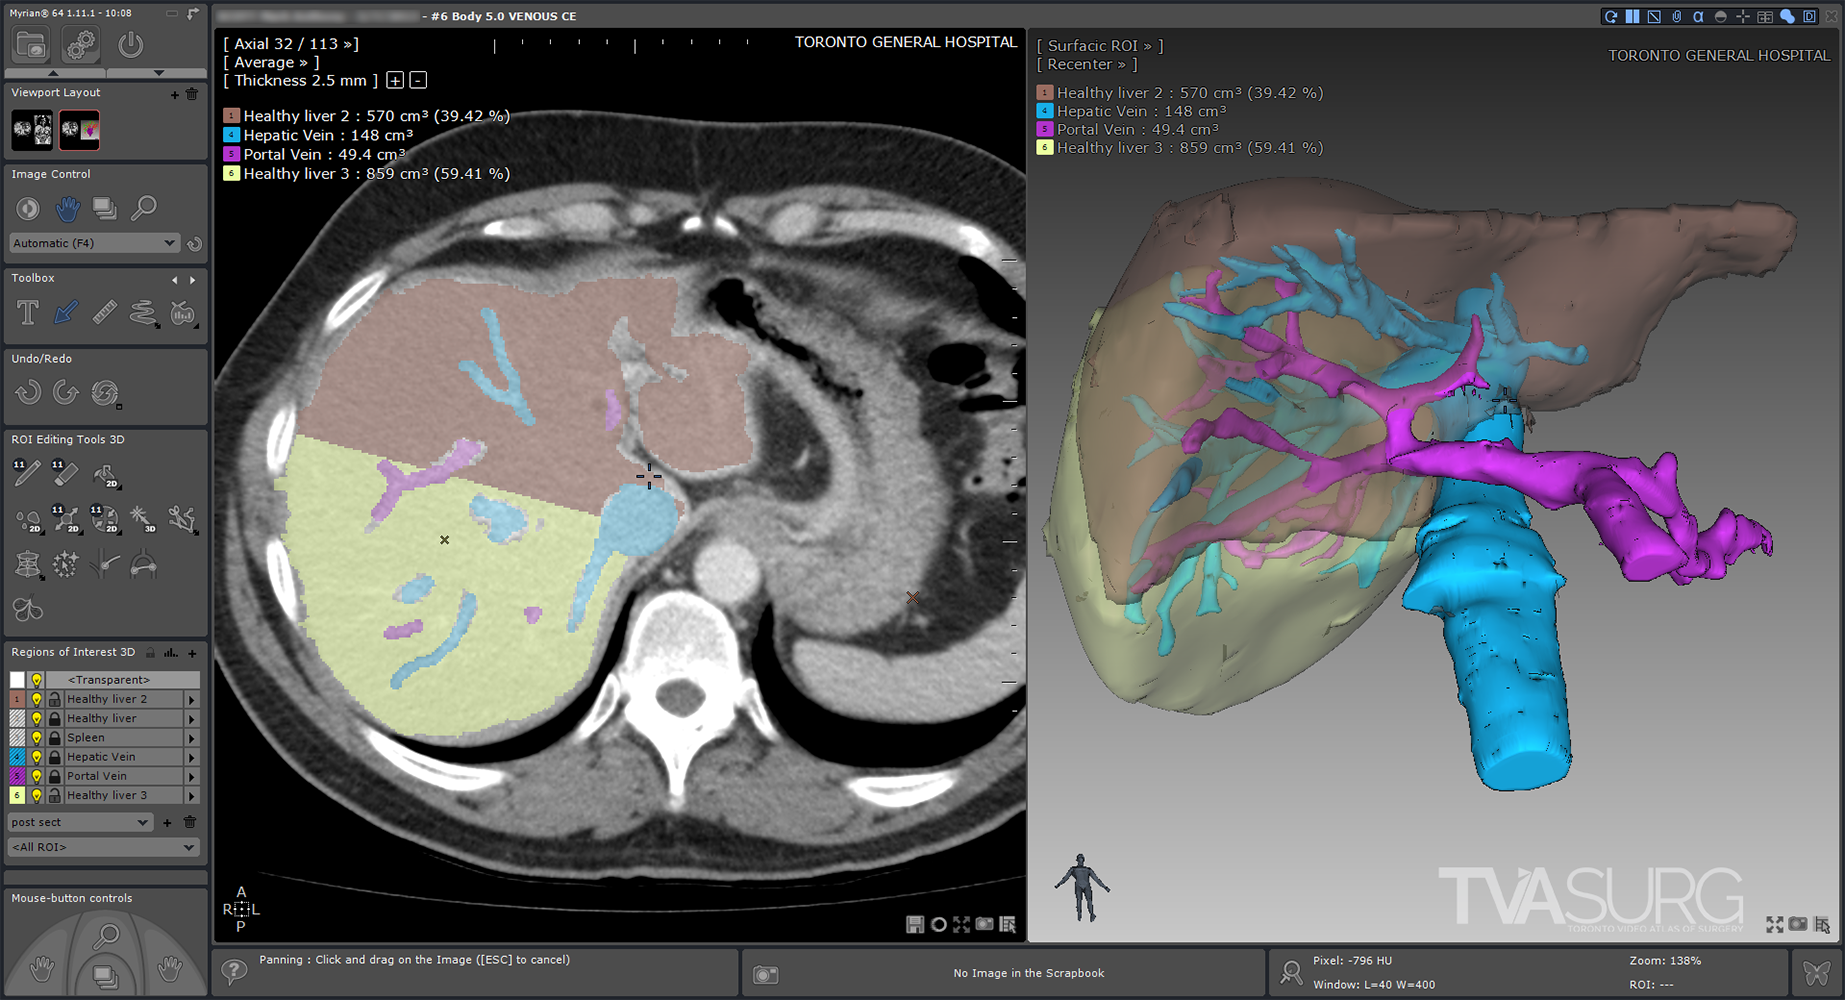
Because vascular anatomy of the liver is highly variable between individuals, surgeons must look closely at preoperative imaging scans. There are many software applications which allow surgeons to see a 3D representation of what the imaging scans are showing, by building 3D geometry based on consistent tissue densities found throughout the scan series.
The first step of our modelling process involves the use of specialized 3D-reconstruction software, which allows the user to view a series of medical imaging scans, such as CT or MRI, and extract the relevant anatomy to be reconstructed into surface “meshes” which can then be exported for use in animation software. For most of our HPB cases, we’ve used Intrasense Myrian, but there are other software applications that achieve similar results such as Fujifilm Synapse, and there are also open-source options such as Horos and 3Dslicer. Each of these programs allow the user to isolate different organs and blood vessels on each of the slices in a series to be fed through an algorithm that will produce a 3D model.
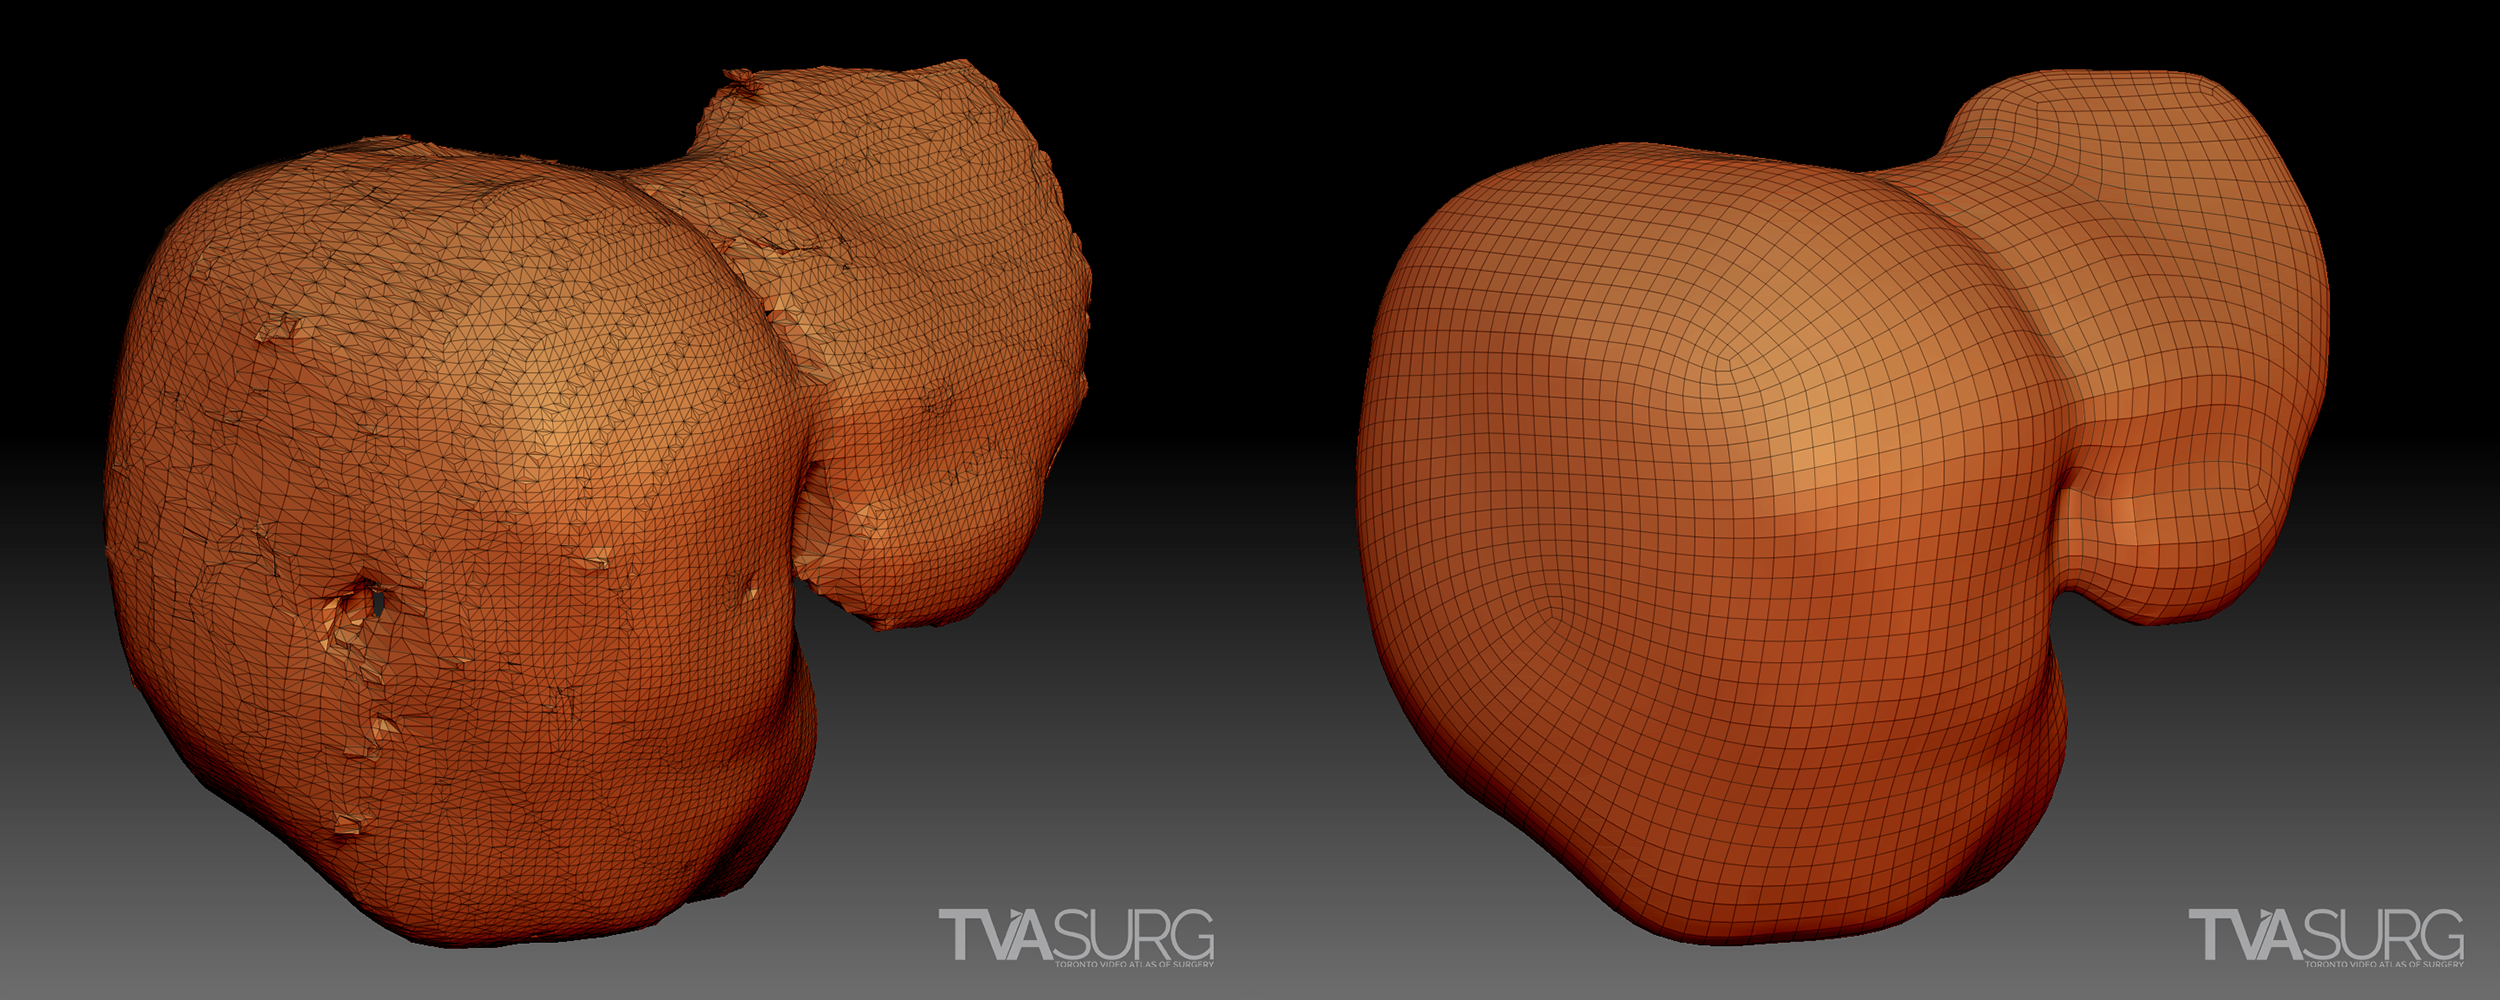
Sometimes we can use the raw reconstructions produced by the medical imaging software, but more often, they are distorted and/or have artifacts. Almost always, they have disorganized, polygon “dense” topology, so the models will need to be retopologized before they are usable for animation.
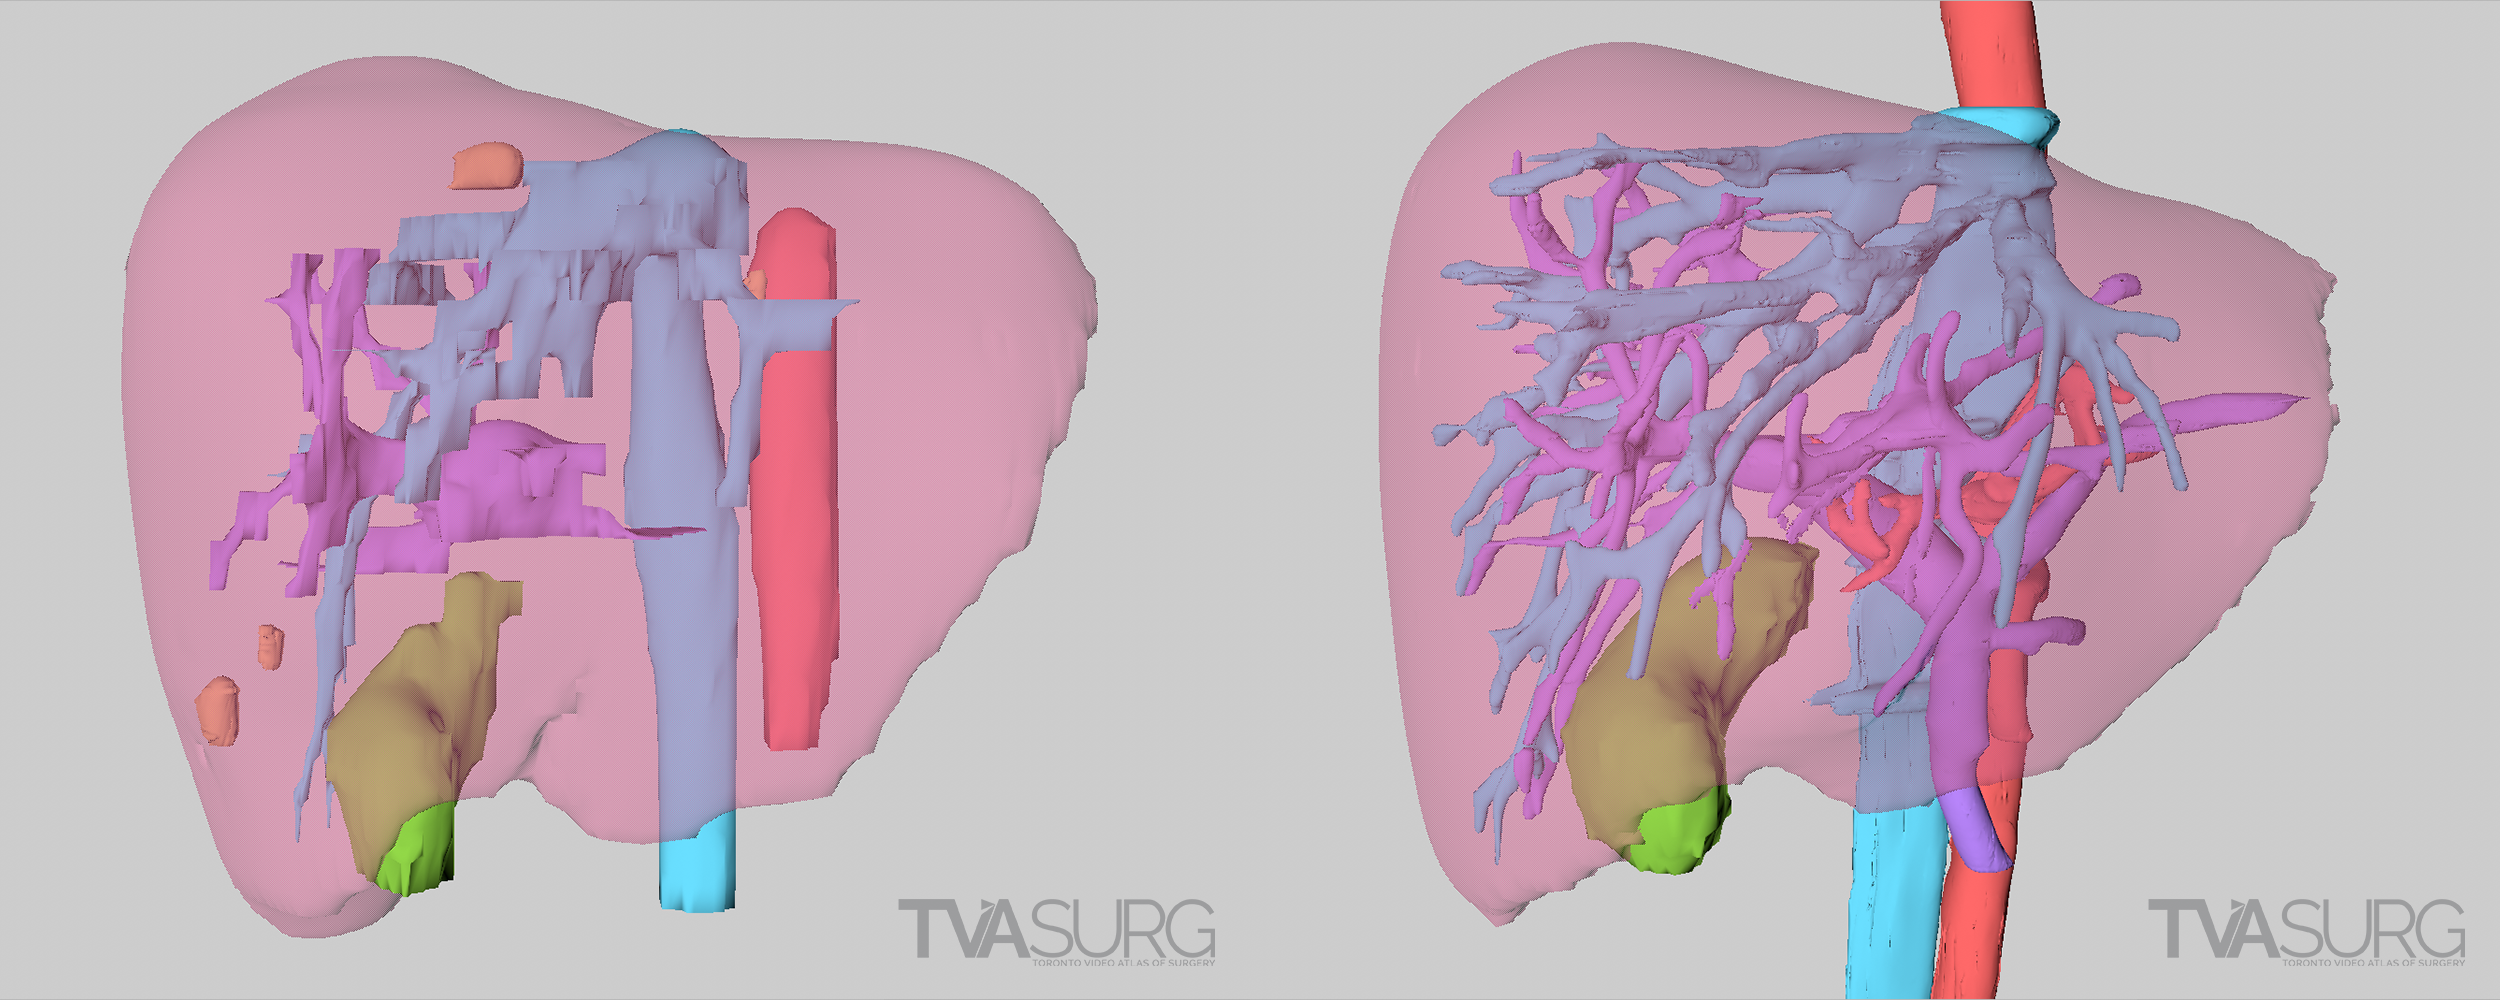
In the above example, from our segment 1/4 mesohepatectomy video, two different reconstructions are shown from the same patient. In the first example, the models are based off of a scan series with thick, or widely spaced scan images, and this results in a discernable lack of detail and a jagged appearance. The second example is made from a different image set with thin, or narrowly spaced scan images. A higher degree of detail is the result.
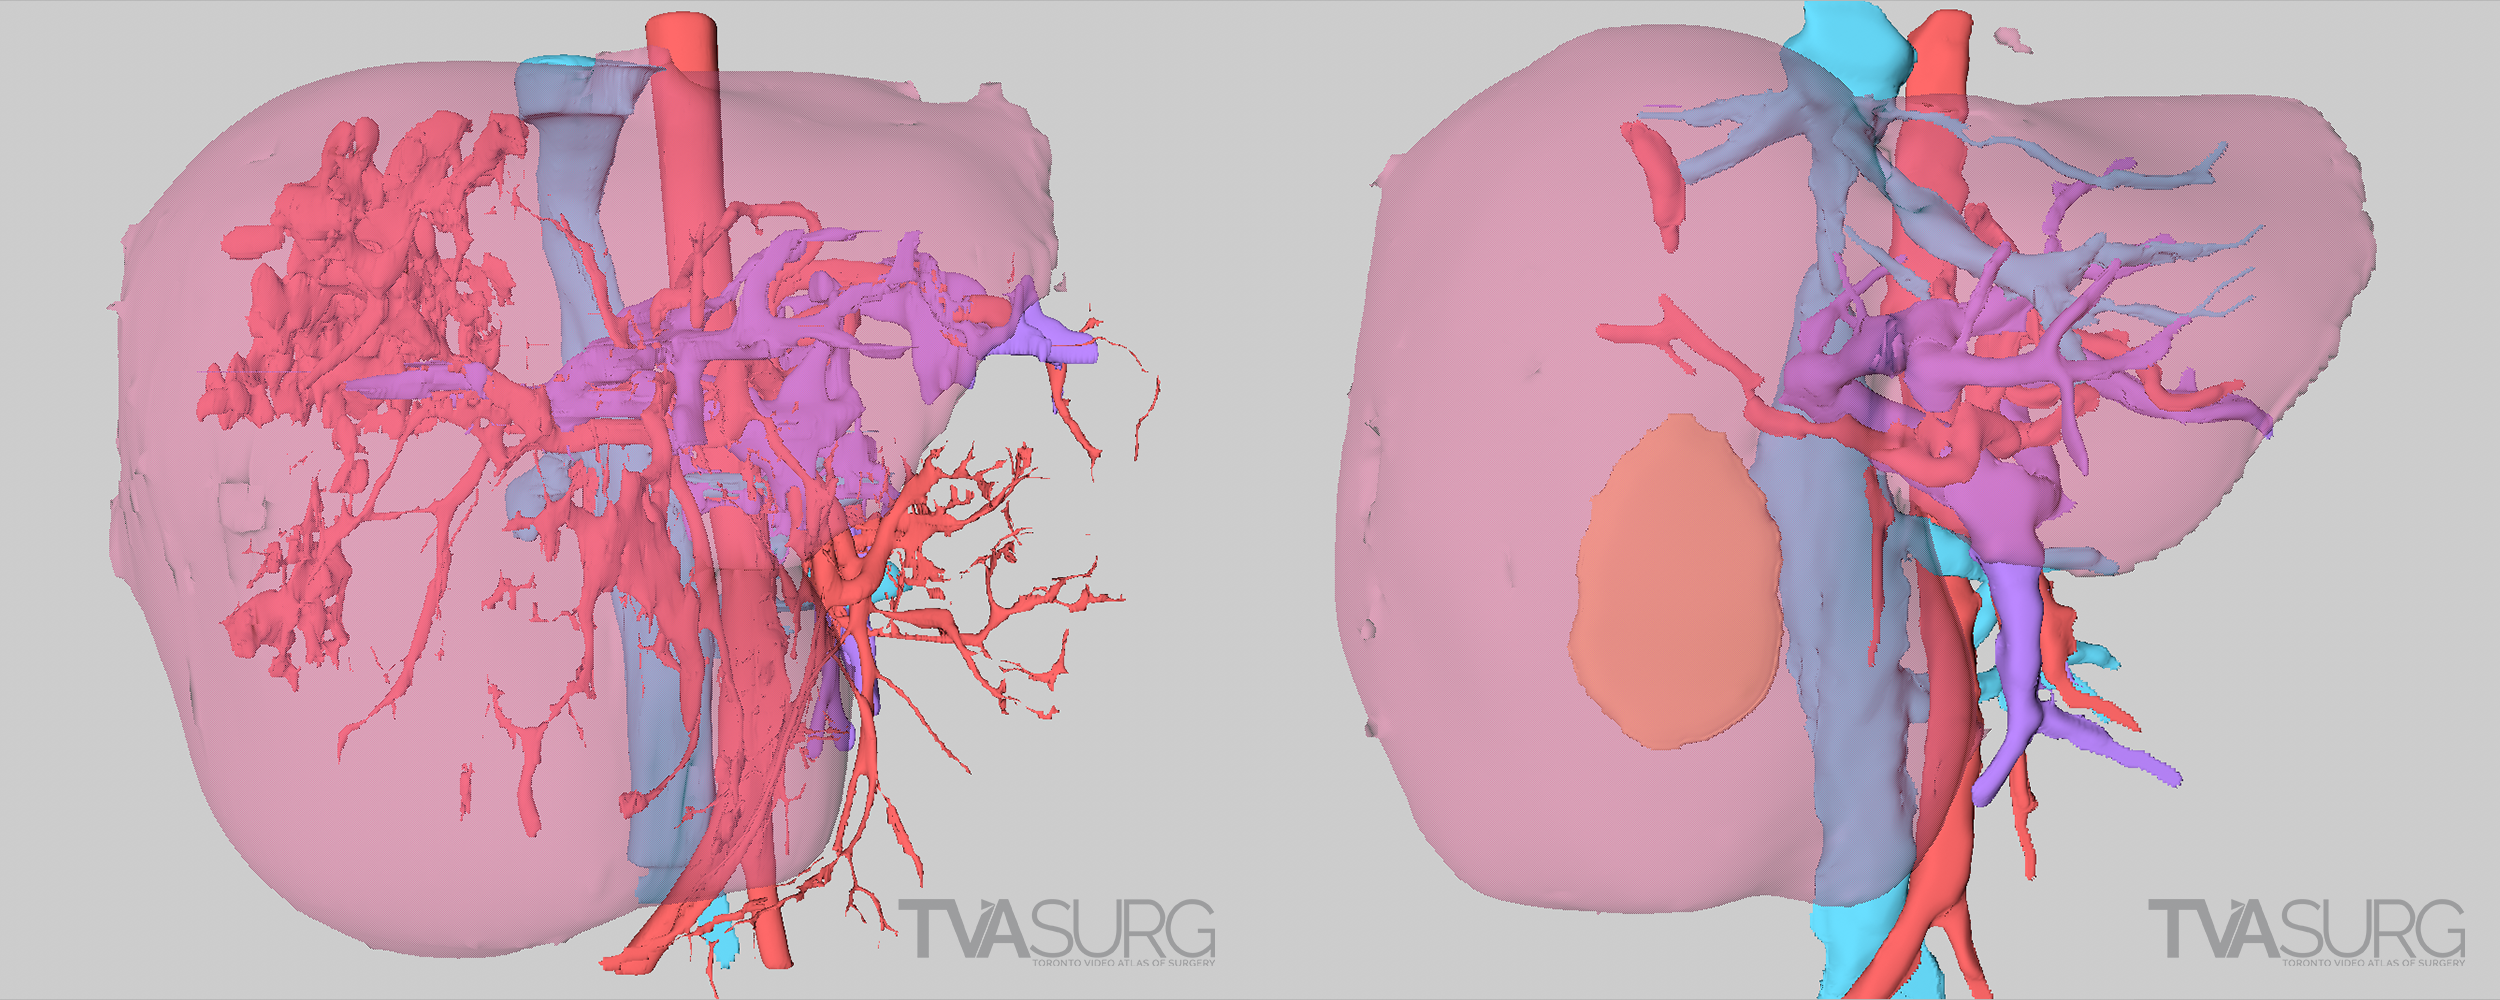
Another significant drawback of these algorithm-produced models is that because they are based on the software’s interpretation of tissue density in the scans, they are limited to the information the scans provide and may mis-interpret structures. A scan series with “thick”, or widely-spaced scan images, will be missing a lot of information, and some structures may be missing entirely. Minuscule, but surgically significant vessels frequently do not show up on CTs, and certain tissue types, most notably bile ducts in HPB studies, are not detectable by these modalities. Distortions in anatomy resulting from pathologies can also obliterate features otherwise obvious to the human eye. There are a lot of “gaps” to be filled by a well-trained and knowledgeable artist–enter the medical illustrator.
The two examples above, from our ALPPS video, show a 3D reconstruction from the same patient at different stages of disease progression. There are significant distortions and omissions in both, resulting from the pathology distorting the anatomy of the liver and vasculature.
MADE TO MOVE: CUSTOMIZING MODELS FOR ANIMATION
The simplest version of a 3D animation is to move a camera around a 3D model, pausing at different locations to give the viewer a specific perspective to appreciate certain aspects of the model. If you really want to tell the story of a surgery however, this basic approach may not be enough to communicate key points of the story. Altering or animating the model itself calls for more than just simple panning, zooming, and rotating of a camera around a stationary object.
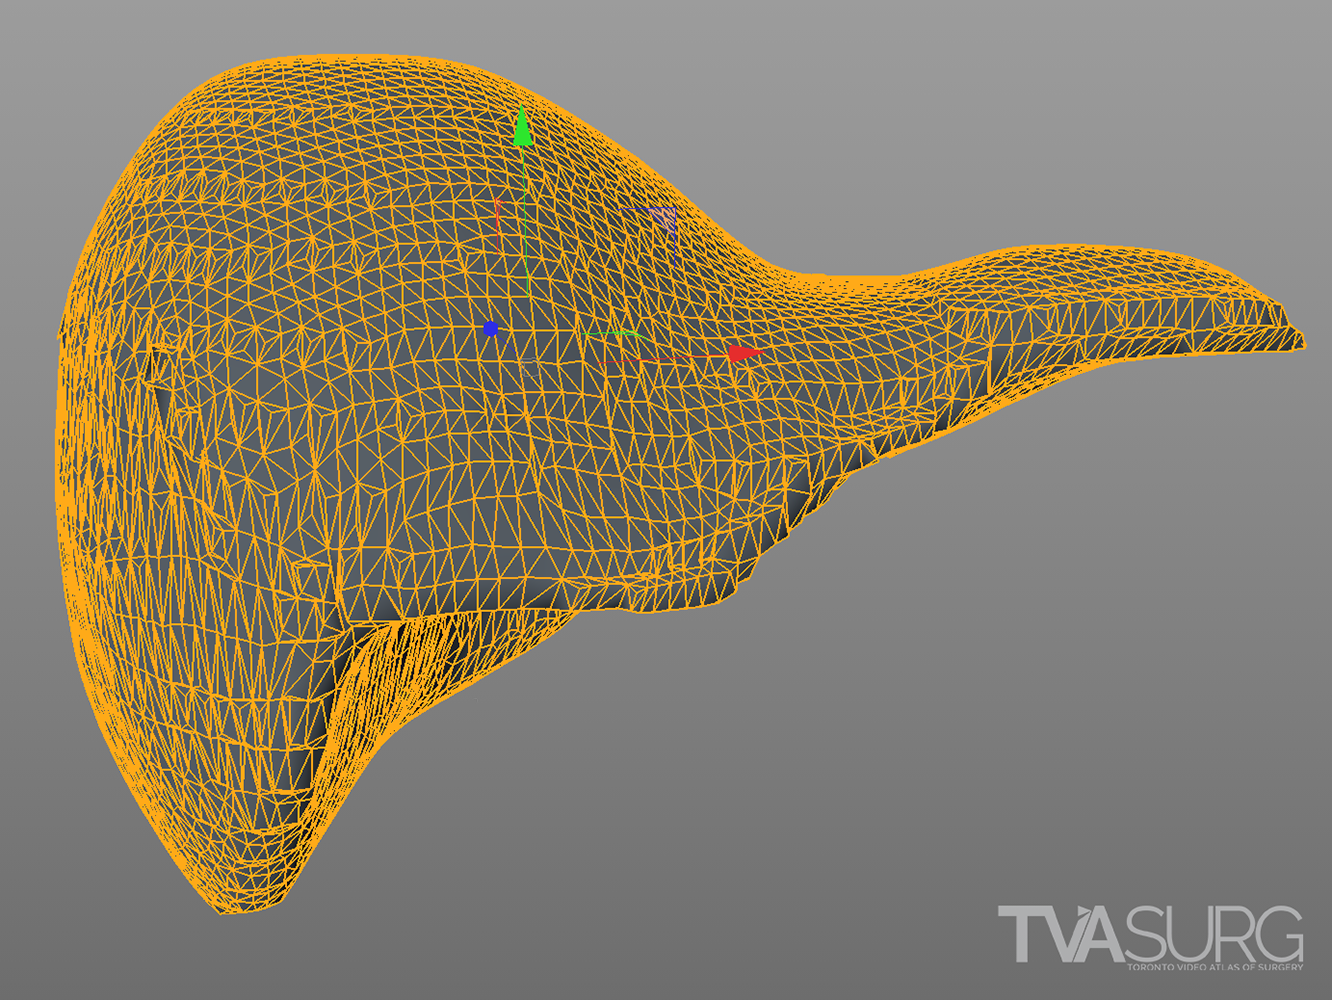
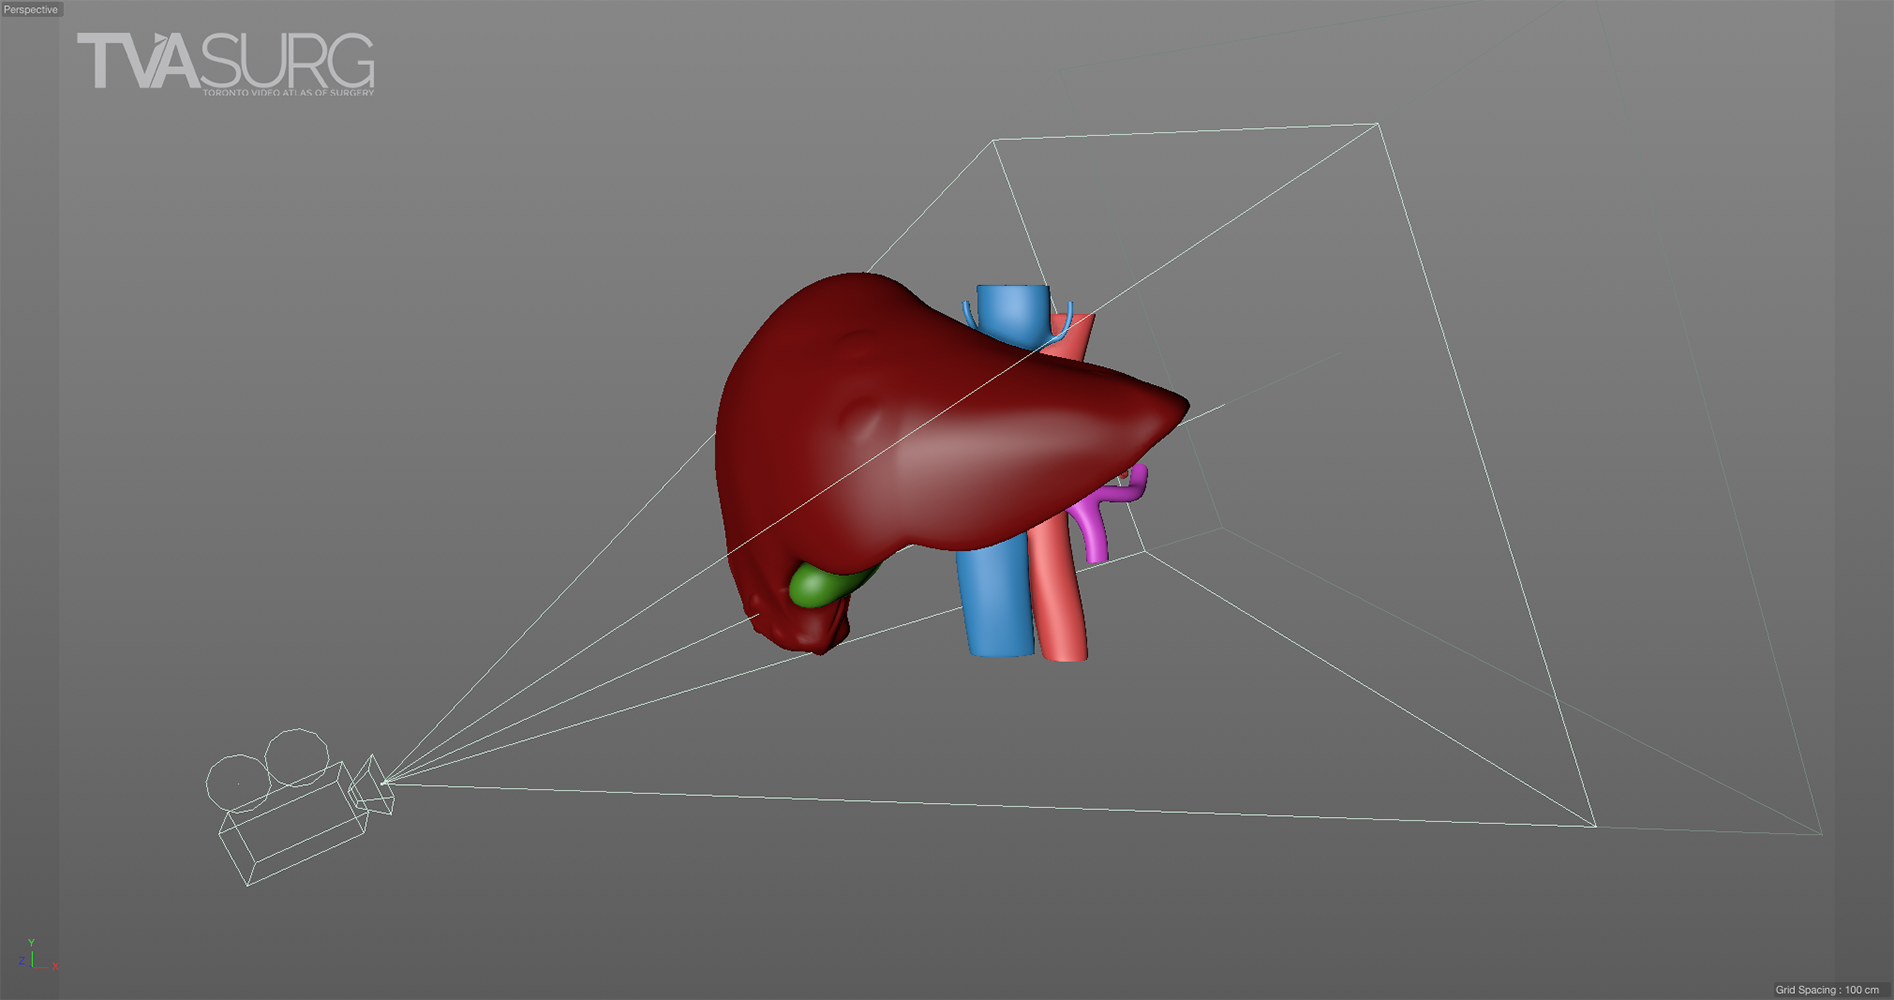
The “topology” of this 3D model reconstruction of a liver produced by medical imagine software is good enough for simple camera-based animations, but may become problematic if the model itself needs to be deformed.
A 3D model’s “topology” refers to the arrangement and distribution of polygons that create its 3D “mesh” or grid-like form. All 3D models are essentially an array of points, or vertices, that each have a coordinate in 3D space (X,Y,Z). By connecting 3 or 4* of these points, a plane is constructed, and on this plane color information can be stored and displayed for animation. That plane needn’t be limited to only one color or even only one pixel of color information.
*While you can technically create a “plane” from any number of points (these are referred to as n-gons in 3D modelling) 3-point trigons or 4-point polygons are the standard for 3D models in computer graphics. N-gons are typically problematic for animation and are considered a 3D modelling faux pas.
Highly dense models such as the 3D reconstructions produced by medical imagine software can be made up of millions, or even billions, of points and polygons. Calculations that software and hardware must manage to track and represent where each of these points are located in 3D space as animation effects are applied, can bog down even high-end machines with a lot of processing power. Representing these 3D forms as efficiently as possible has been a cornerstone of best practice in the 3D animation industry. This is where the workflow for “retopology” comes in.

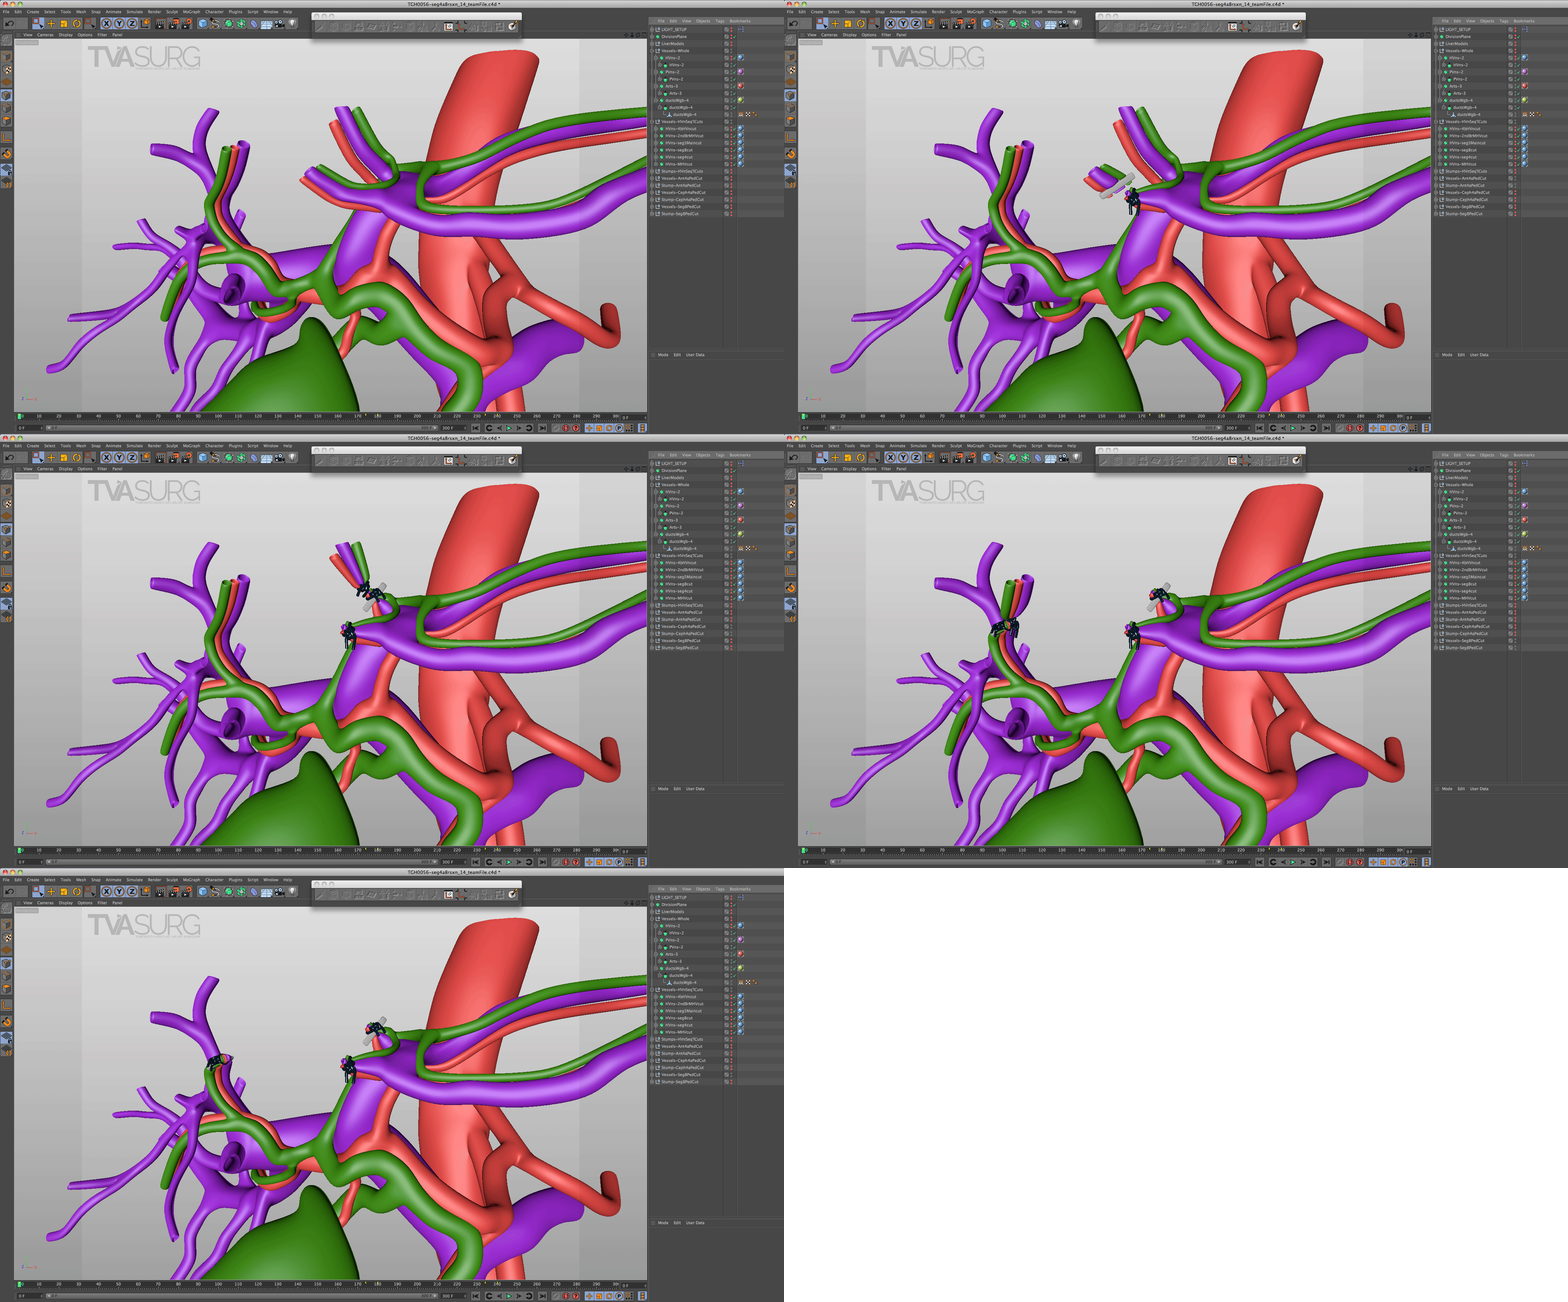
Retopologizing vascular anatomy using a polygonal modelling technique. In these examples, a single polygon face is extruded repeatedly along the course of a vessel to reconstruct the form with cleaner, more manageable mesh geometry.
Retopologizing, or re-building, a 3D mesh can be done using different approaches, but the traditional approach is fairly straight-forward: you simply trace the form out in 3D space using a series of connected rectangles. While at times tedious, this is a good way to build models for use in animation, because your reward for efficiently laid out 3D geometry will be a digital armature that allows for smooth, responsive animation and deformations. The same methodology can be used to prepare a complex model for animation.
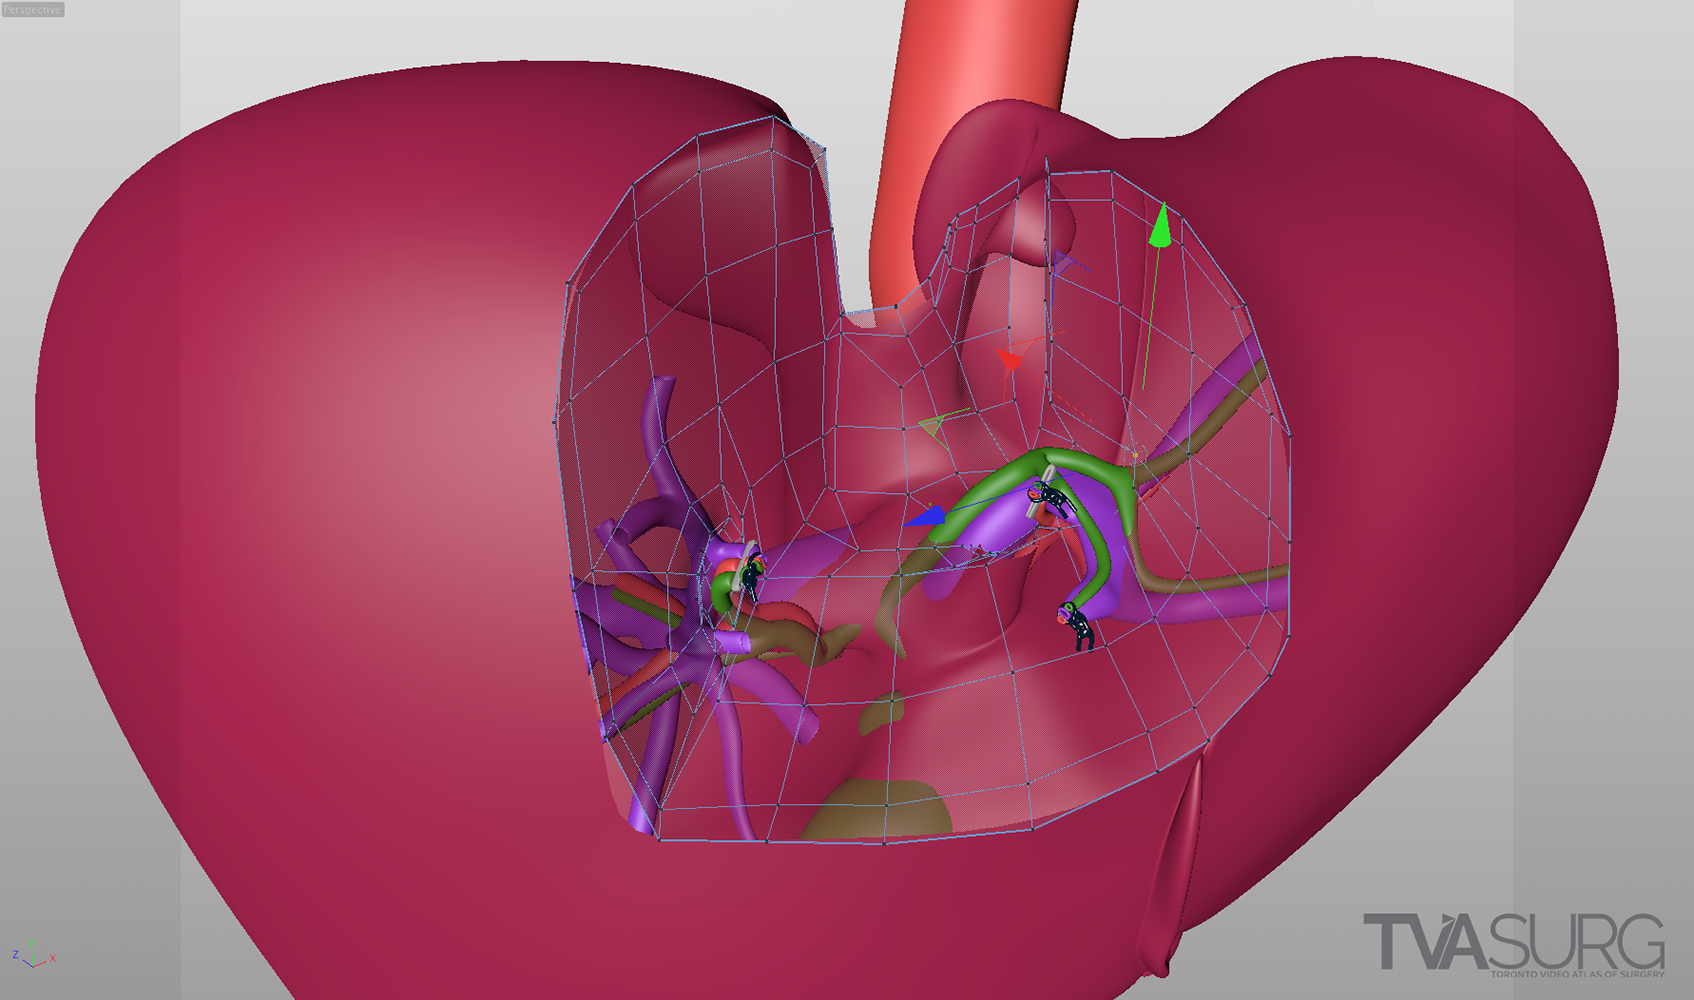
By building a “cage” around a more complex form, animation controls can be translated from the low-poly cage with deformation presets or dynamic tissue simulations. See this technique in action in our Laparoscopic Cholecystectomies learning module.
A different approach to 3D modelling is referred to as “sculpting,” popularized by Pixologic ZBrush. Sculpting allows an artist to treat a 3D model as a digital ball of clay, and is the best way to add fine surface details. In the latest versions of high-end animation software such as Maxon Cinema4D or the open-source Blender, sculpting features have been integrated into the programs without the need to switch to another application.

Sculpted details help to communicate the surface texture of an object and add to the realism of the final render.
ATTENTION TO DETAIL: FOCUSED REVISIONS
Because surgeons are often tight for time, we have to get the most out of every meeting. Our approach to pooling critique of separate 3D models is to focus the discussion on where each of these structures must align both physically and narratively. In the case of liver resections and living donor procedures, there will be a plane of transection through the liver. The plane may end up being slightly different from what they planned, so our models need to reflect where the plane ended up as seen in the footage. By precisely identifying why the transection plane was chosen and where the plane ended up in the procedure, we efficiently determine 1) the anatomical structures of focus, 2) where these structures were cut, 3) camera positions for animation and 4) the order of events for the overall narrative. After the transection plane has been aligned properly with the liver, we focus in on the structures in the porta and where they are divided.
With the guidance of the operating surgeon, we locate key structures and develop our narrative around them. Constructing highly accurate 3D models for surgical animation requires an ongoing dialogue between the video production team and the medical practitioners. Our modelling decisions are also driven by what we see in the footage as we edit.
Revisions to our 3D models are most intensive for structures that must be handled delicately in the OR. In our donor 6/7 segmentectomy video, careful attention is paid to the bile duct anatomy, which is sensitive to injury and critical for a successful transplant.
As our models are implemented into case summary introduction animations and footage overlay illustrations, our understanding of the surgery is enhanced at the same time the surgeon's understanding of effective visual communication is illuminated. As we gain a better understanding of the anatomy as seen in the operation, adjustments are made so that all structures appear as they should when encountered by the surgeon, and will best align with the footage at the points in time in which overlays are called for.
THE CUTTING EDGE: LOOKING TO THE FUTURE OF 3D MODELS
3D anatomical models have been used for surgical teaching for years, and this aspect of surgical education will only be enhanced by the latest technologies. We have thus far discussed the application of 3D models for creating animations, which are linear narratives, but further applications include surgical teaching simulations, virtual reality, augmented reality, and 3D printing.
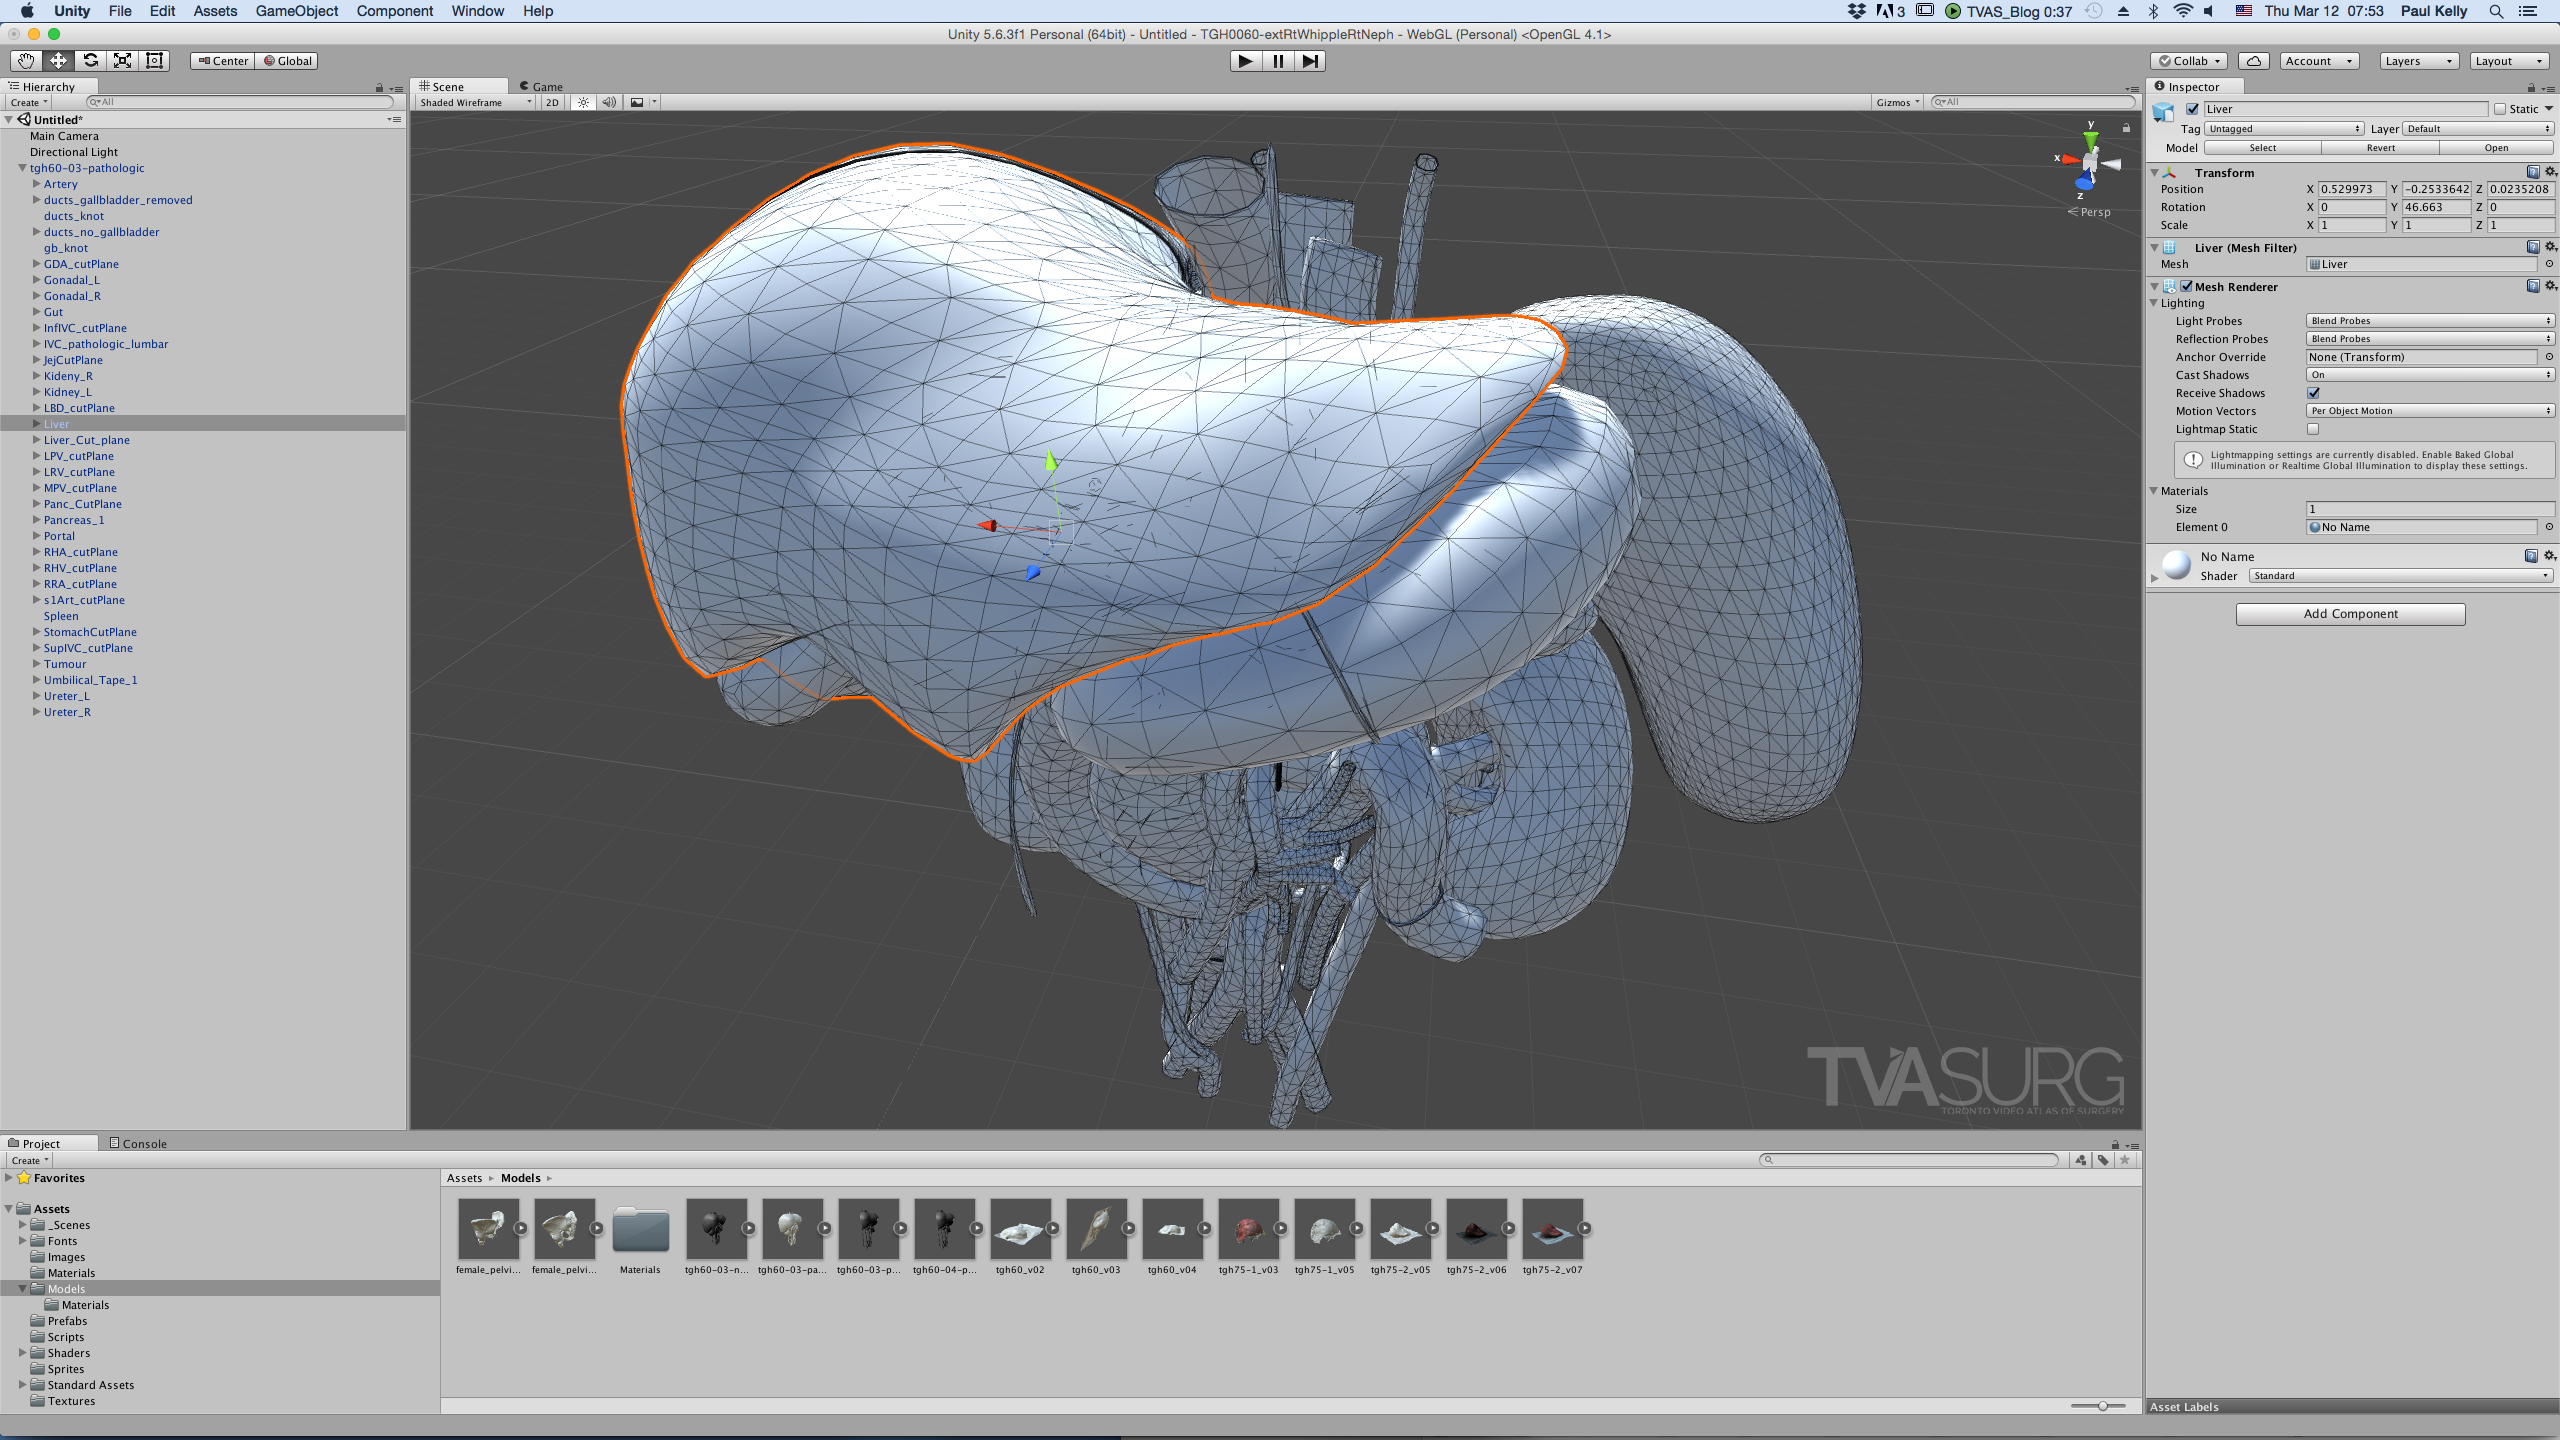
Models imported into Unity are turned into all tris, decimated to 65k polygons or less, and benefit from UV mapping.
When importing 3D model assets into a gaming engine such as Unity to make interactive modules, a different set of requirements for models must be considered. First is that no matter how the models are constructed elsewhere, when imported into a game engine, the software will automatically convert the topology into triangles, no matter what state its original format. Knowing this, you are better off converting the model yourself so you can observe how the topology translates and get a poly count beforehand. Unity has a limit of 65k tris per imported model. If your model has more than 65k tris, it will get split into multiple parts. Another consideration is that shaders in gaming software work a bit differently than those in animation programs, and rely more on texture maps than procedural shaders. We’ll cover these topics in more depth in a future process post, but for now, just know that minimal and efficient model topology is a valued attribute for 3D models: less is more.
3D printing has continued to impress and inspire, and the potential to revolutionize medicine is already being realized. Preparing a 3D model for 3D printing is yet another separate set of considerations, and a process that deserves an entire post unto itself. A few key take-aways are that the model will need to be converted into STL format to import into 3D printing software, which will export a gcode file to be read by the printer itself. The model should lay flat if possible to reduce or eliminate the need for support structures. Additional considerations will depend on the type of 3D printer you are using.
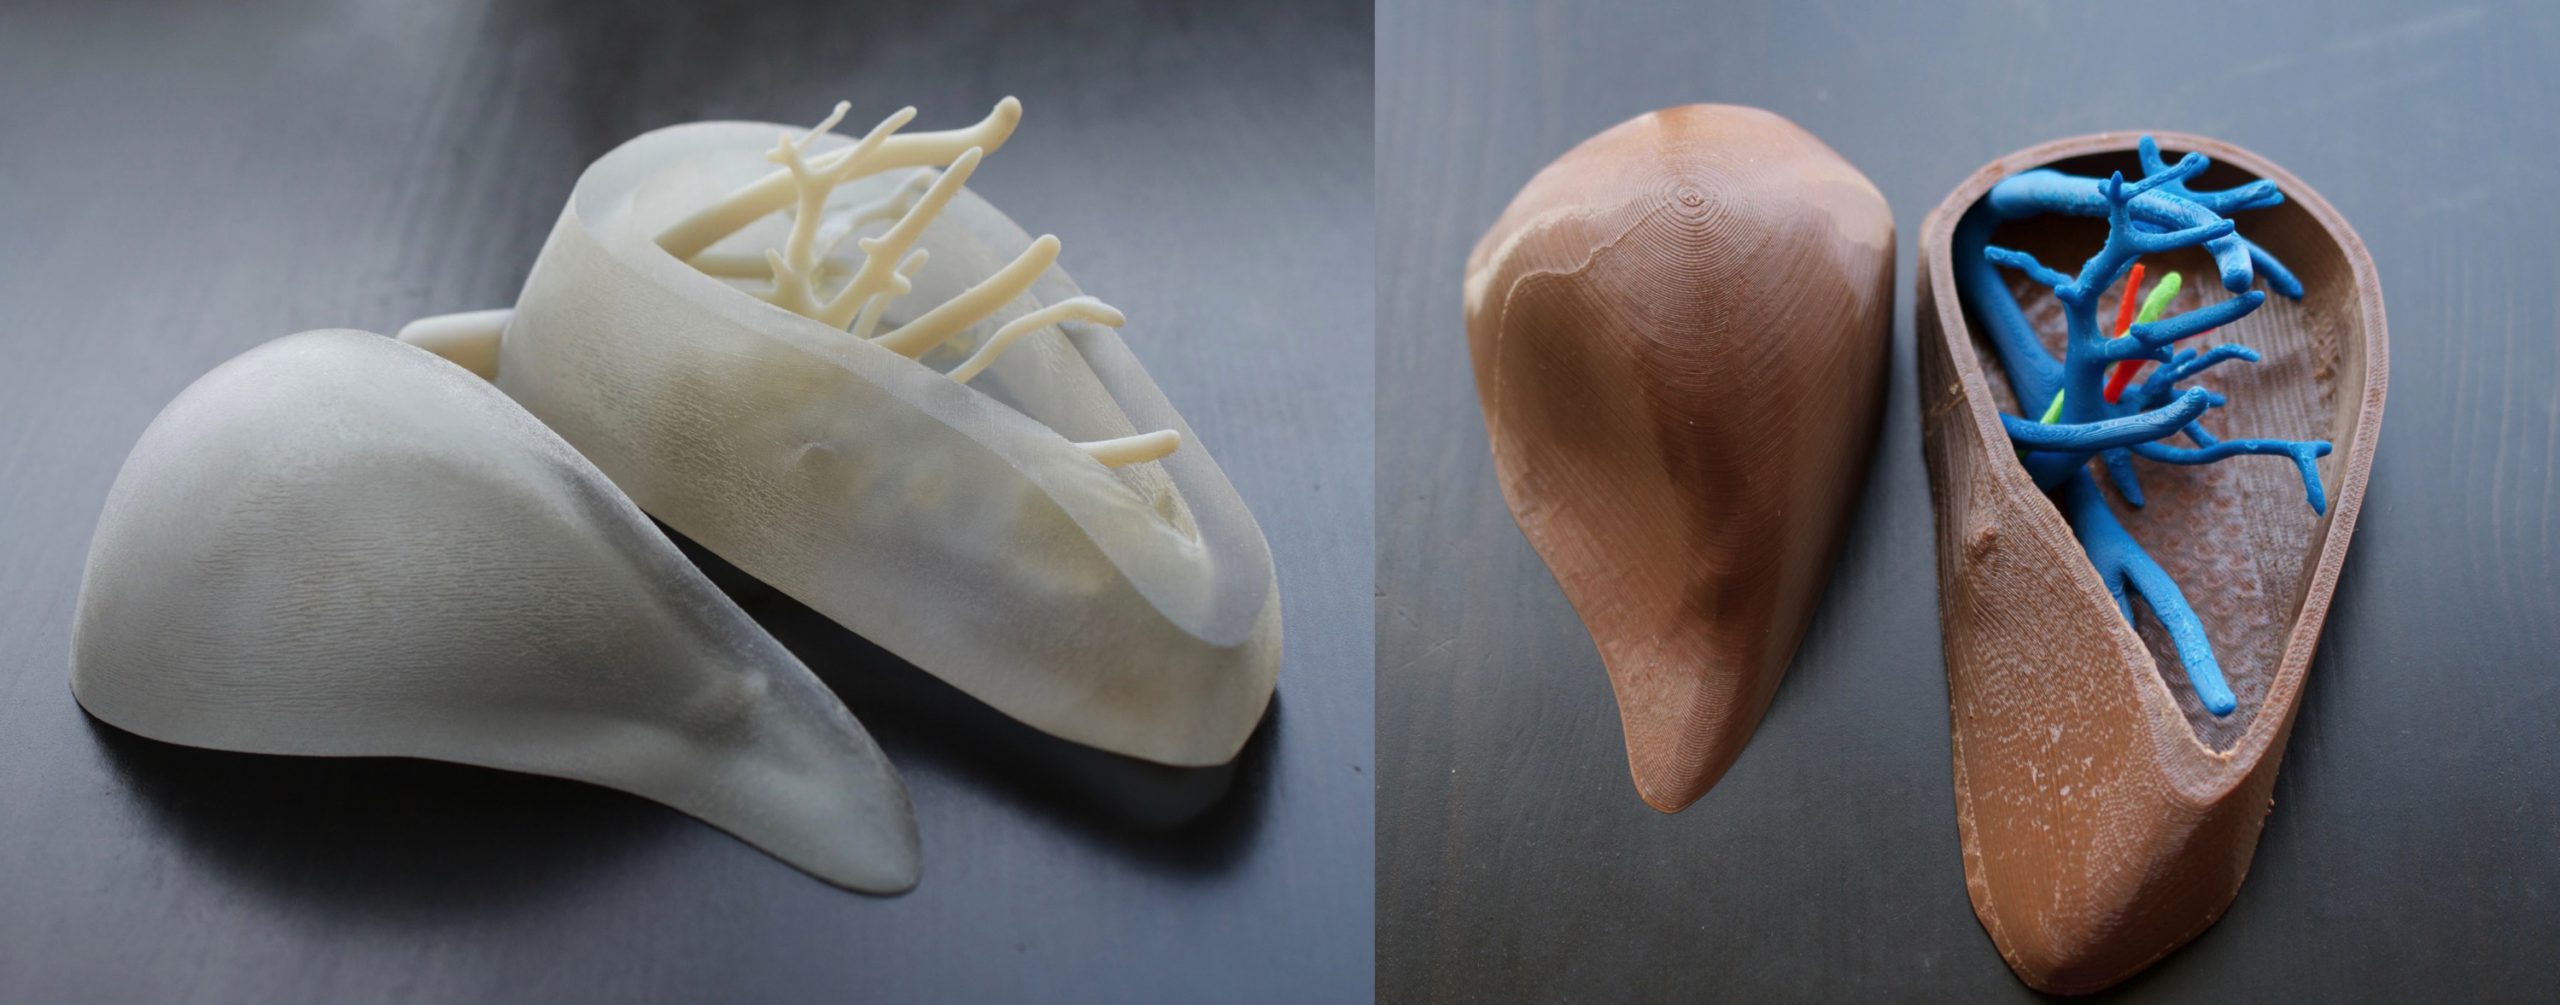
3D model files must be optimized for 3D printing and converted into a proper file format.
Stay tuned as we continue to add posts to our “process” series. If you haven’t already, check out our Patreon page, where contributions may steer us towards the most-requested topics in future posts!
–TVASurg Team
REFERENCES
Brazina, D., Fojtik, R., & Rombova, Z. (2014). 3D visualization in teaching anatomy. Procedia-Social and Behavioral Sciences, 143, 367-371.
Crossingham, J. L., Jenkinson, J., Woolridge, N., Gallinger, S., Tait, G. A., & Moulton, C. A. E. (2009). Interpreting three‐dimensional structures from two‐dimensional images: a web‐based interactive 3D teaching model of surgical liver anatomy. HPB, 11(6), 523-528.
Lewis, T. L., Burnett, B., Tunstall, R. G., & Abrahams, P. H. (2014). Complementing anatomy education using three‐dimensional anatomy mobile software applications on tablet computers. Clinical Anatomy, 27(3), 313-320.
Miller, A., Lax, L., Woolridge, N., & Agur, A. (2018). The Case of Ken Lowery: Visual Knowledge Building and Translation of Volumetric Radiographic Imagery for Dynamic 3D Medical Legal Visualization. Journal of Biocommunication, 42(2). https://doi.org/10.5210/jbc.v42i2.9549
Mitrousias, V., Varitimidis, S. E., Hantes, M. E., Malizos, K. N., Arvanitis, D. L., & Zibis, A. H. (2018). Anatomy learning from prosected cadaveric specimens versus three-dimensional software: A comparative study of upper limb anatomy. Annals of Anatomy-Anatomischer Anzeiger, 218, 156-164.
Nguyen, N., & Wilson, T. D. (2009). A head in virtual reality: Development of a dynamic head and neck model. Anatomical sciences education, 2(6), 294-301.
Nickel, F., Hendrie, J. D., Bruckner, T., Kowalewski, K. F., Kenngott, H. G., Müller-Stich, B. P., & Fischer, L. (2016). Successful learning of surgical liver anatomy in a computer-based teaching module. International journal of computer assisted radiology and surgery, 11(12), 2295-2301.
Numminen, K., Sipilä, O., & Mäkisalo, H. (2005). Preoperative hepatic 3D models: virtual liver resection using three-dimensional imaging technique. European journal of radiology, 56(2), 179-184.
Pugliese, L., Marconi, S., Negrello, E., Mauri, V., Peri, A., Gallo, V., ... & Pietrabissa, A. (2018). The clinical use of 3D printing in surgery. Updates in surgery, 70(3), 381-388.
Pujol, S., Baldwin, M., Nassiri, J., Kikinis, R., & Shaffer, K. (2016). Using 3D modeling techniques to enhance teaching of difficult anatomical concepts. Academic radiology, 23(4), 507-516.
Sergovich, A., Johnson, M., & Wilson, T. D. (2010). Explorable three‐dimensional digital model of the female pelvis, pelvic contents, and perineum for anatomical education. Anatomical Sciences Education, 3(3), 127-133.
Vernon, T., & Peckham, D. (2002). The benefits of 3D modelling and animation in medical teaching. Journal of Audiovisual media in Medicine, 25(4), 142-148.
Zilverschoon, M., Vincken, K. L., & Bleys, R. L. (2017). The virtual dissecting room: Creating highly detailed anatomy models for educational purposes. Journal of biomedical informatics, 65, 58-75.

