Lately we’ve been exploring some of the compositing and graphics features of the “Fusion” component of the free video editing software DaVinci Resolve by Blackmagic design. In previous blogs we've shown how we use DaVinci Resolve to edit surgical footage, gave an overview of all the features DaVinci Resolve offers, and demonstrated how to add text to your videos using text presets in DaVinci Resolve with some tweaks in Fusion. Let’s take a deeper look at some of the functions Fusion offers.
Adding graphic effects with Fusion
Here’s an example of adding a simple graphic effect, an animated line for where a surgical cut will take place, using Fusion.
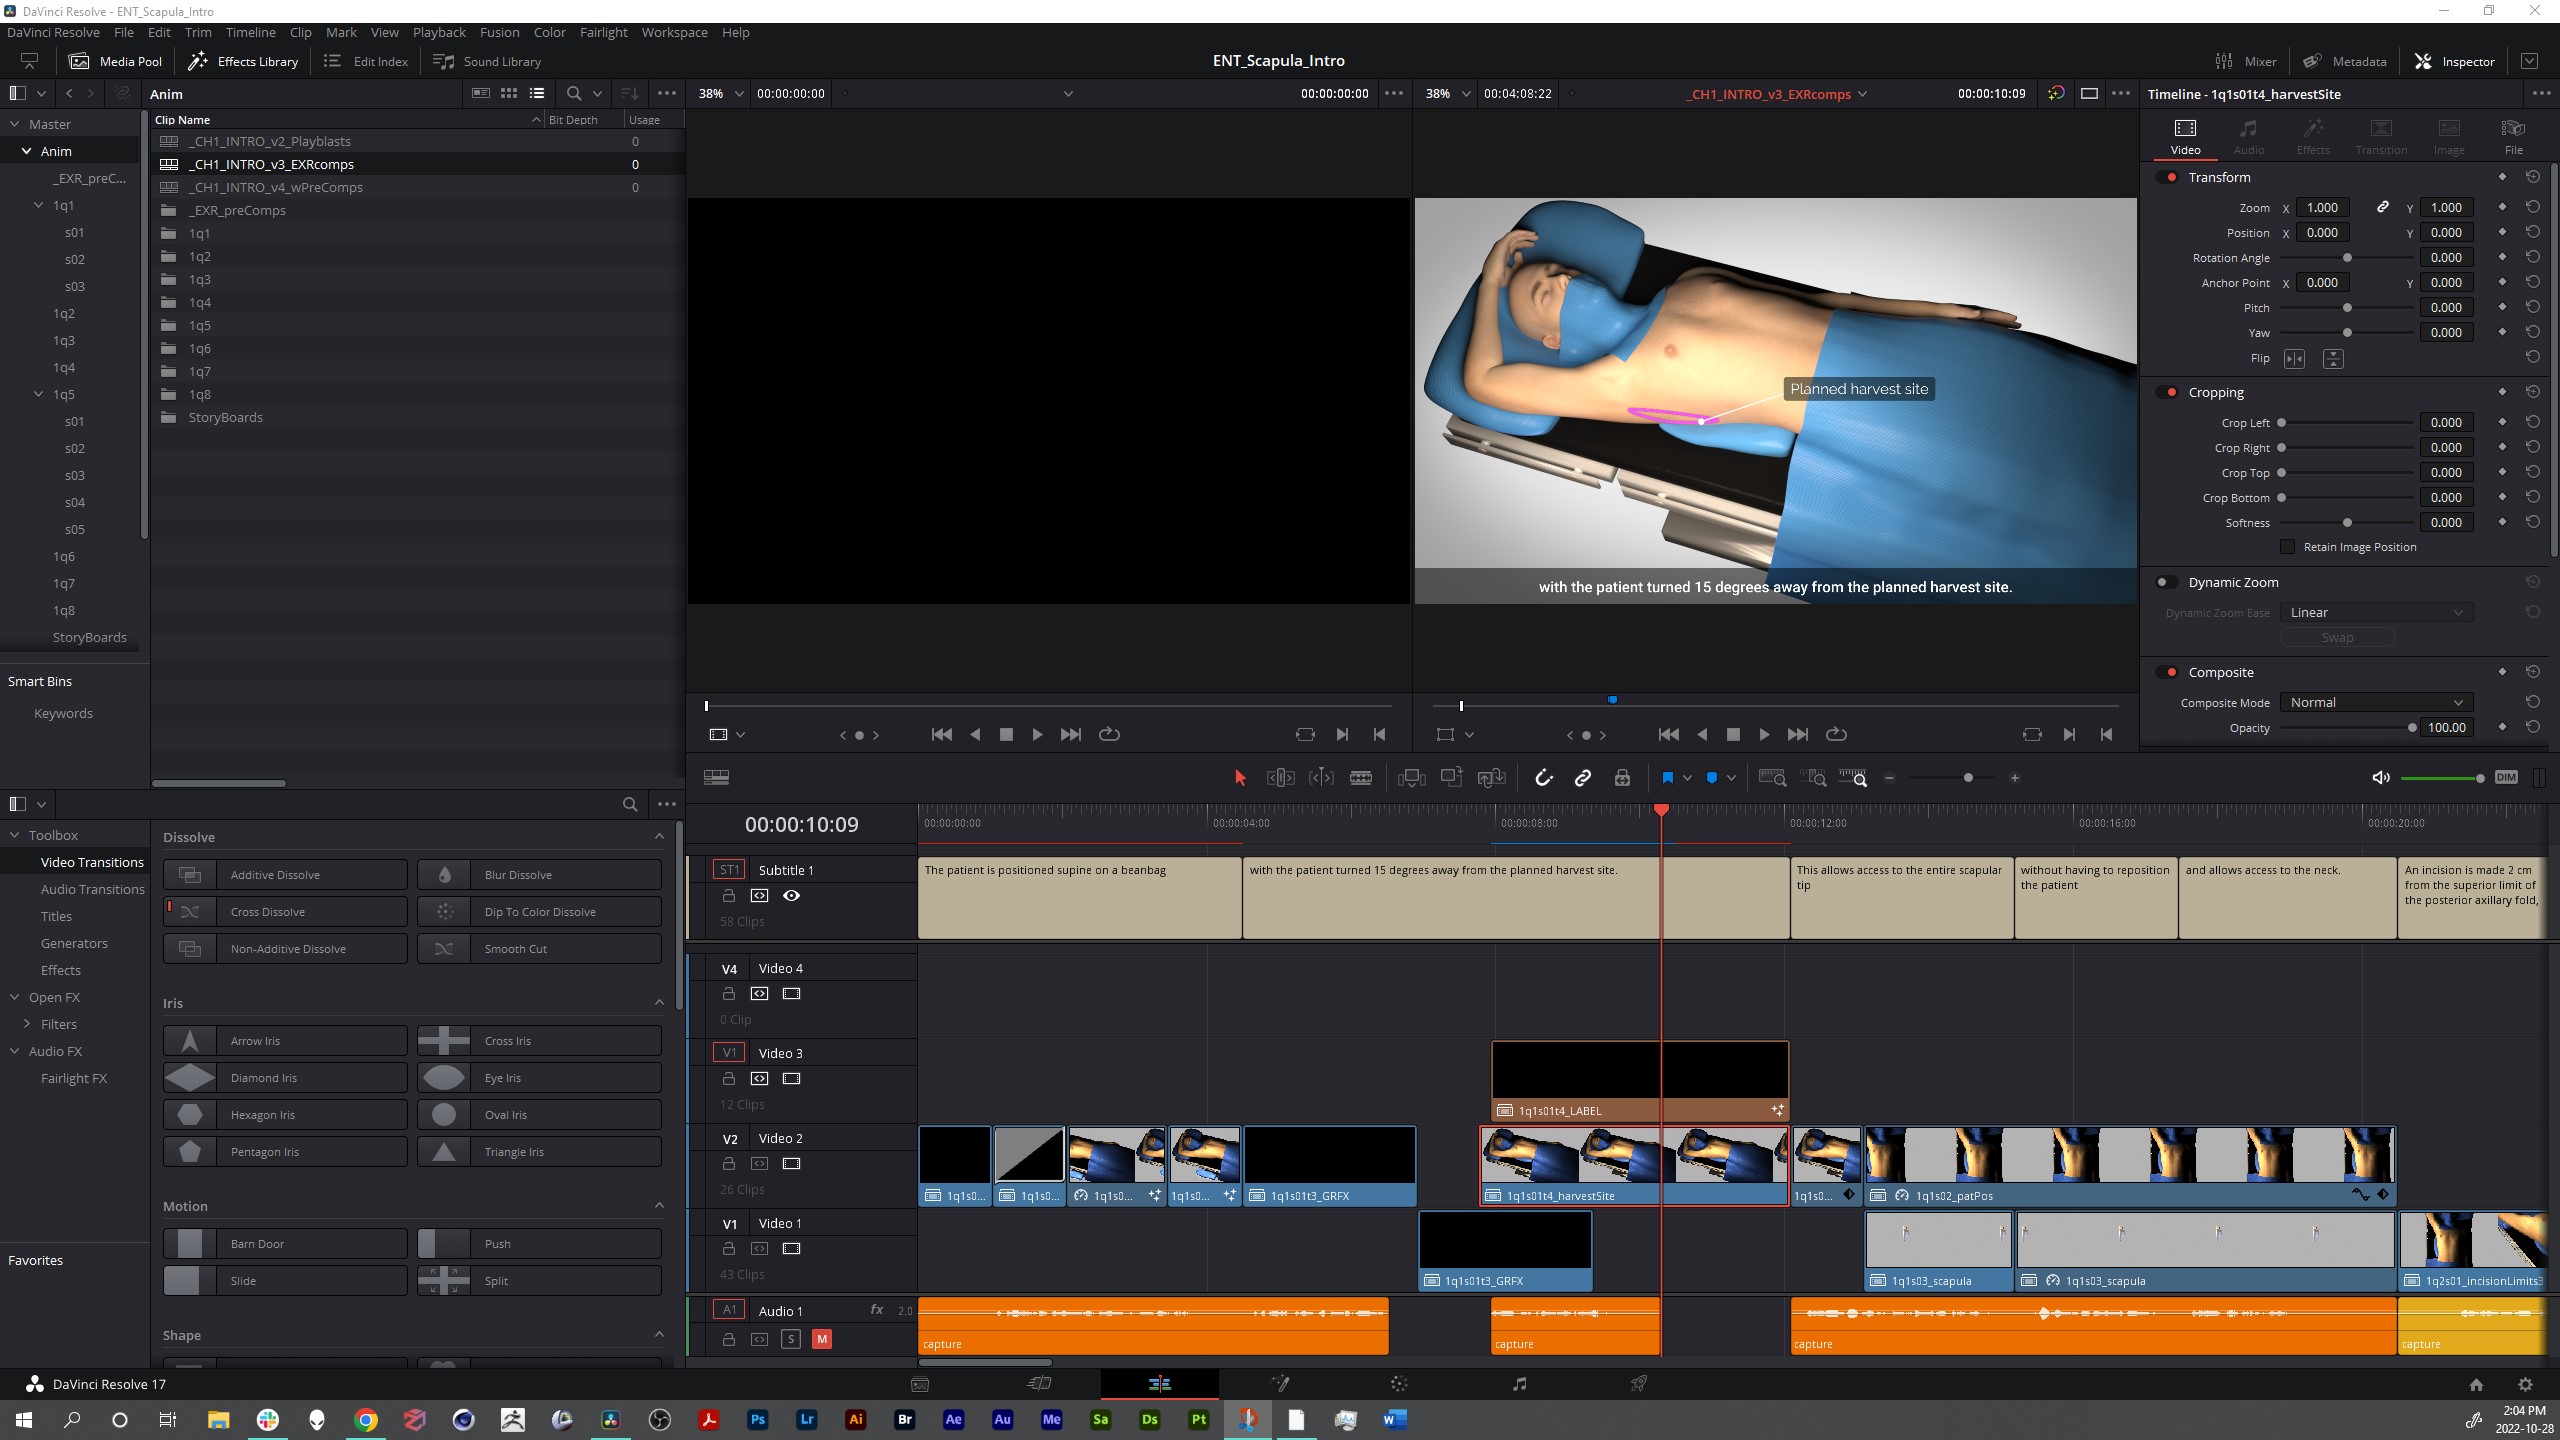
In DaVinci Resolve’s Timeline we have our clips laid out, and all you have to do is highlight a clip in the Timeline, and go to the Fusion page in DaVinci Resolve. Instantly you’re in the Fusion workspace with two nodes: “MediaIn” and “MediaOut”:
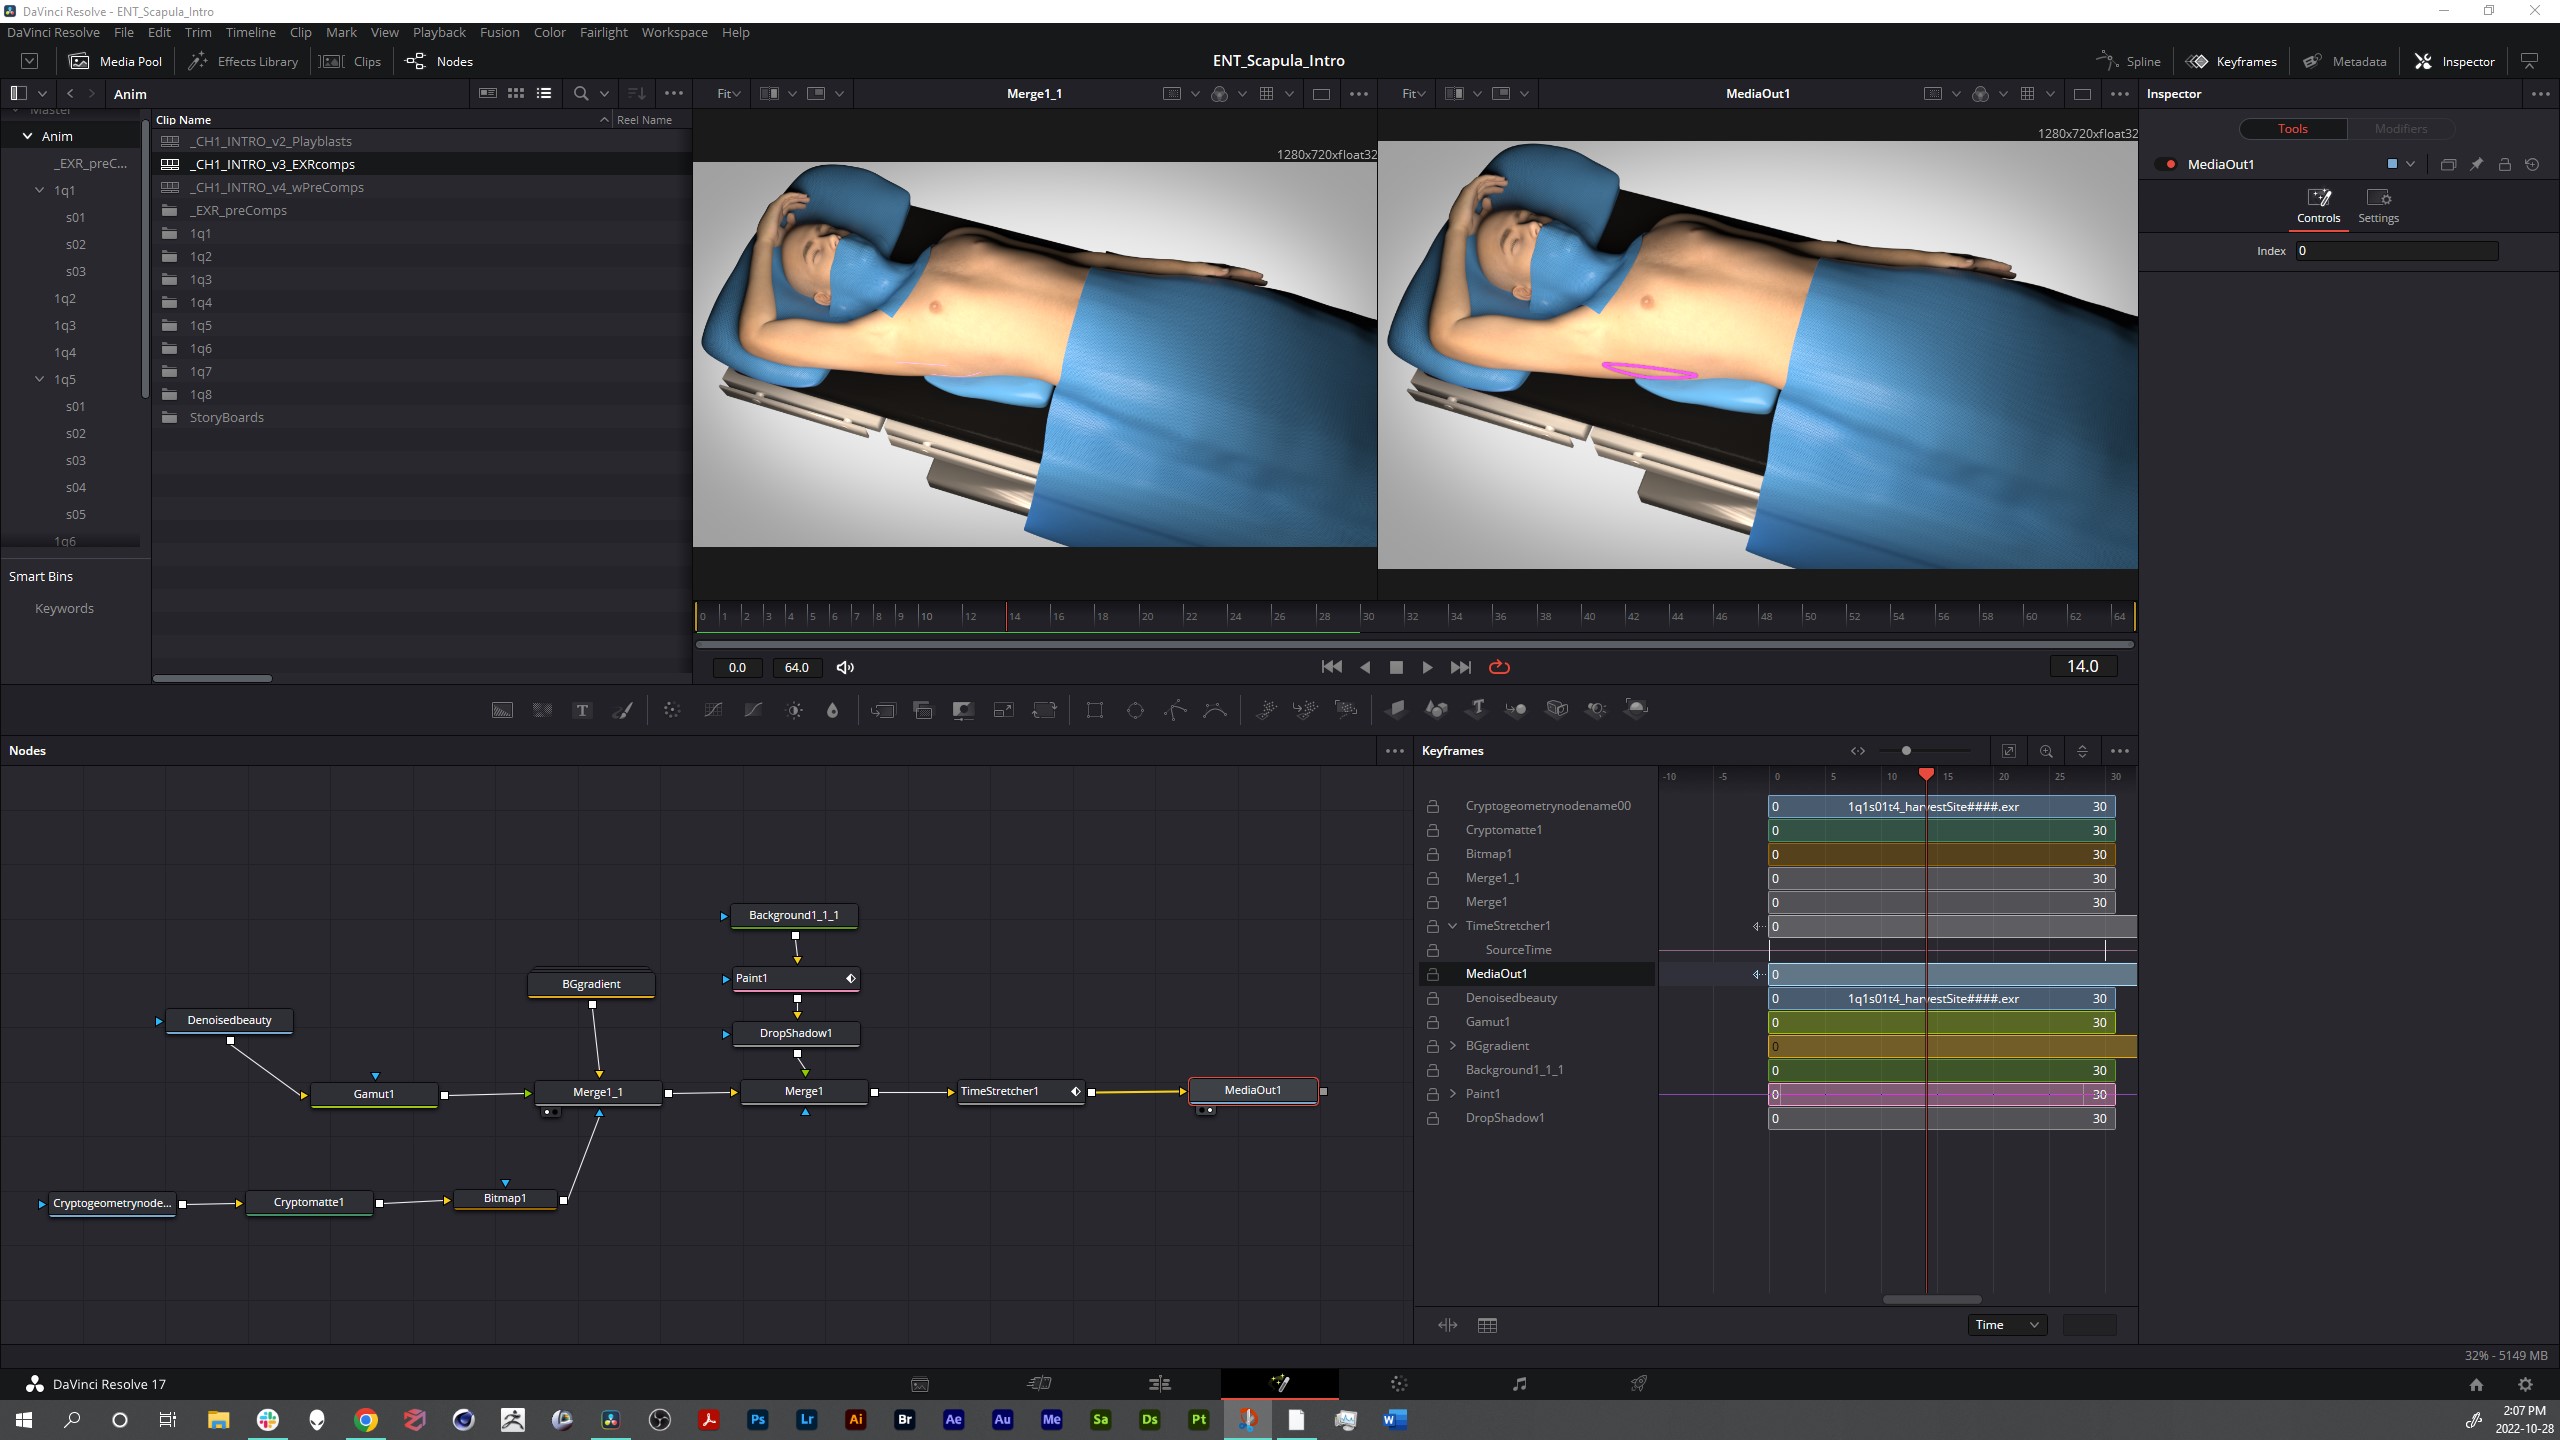
We can now add additional nodes in between these two to add effects. In the example shown above, a 3D rendered image sequence is the “MediaIn” and there are several nodes in between it and the output “MediaOut” node.
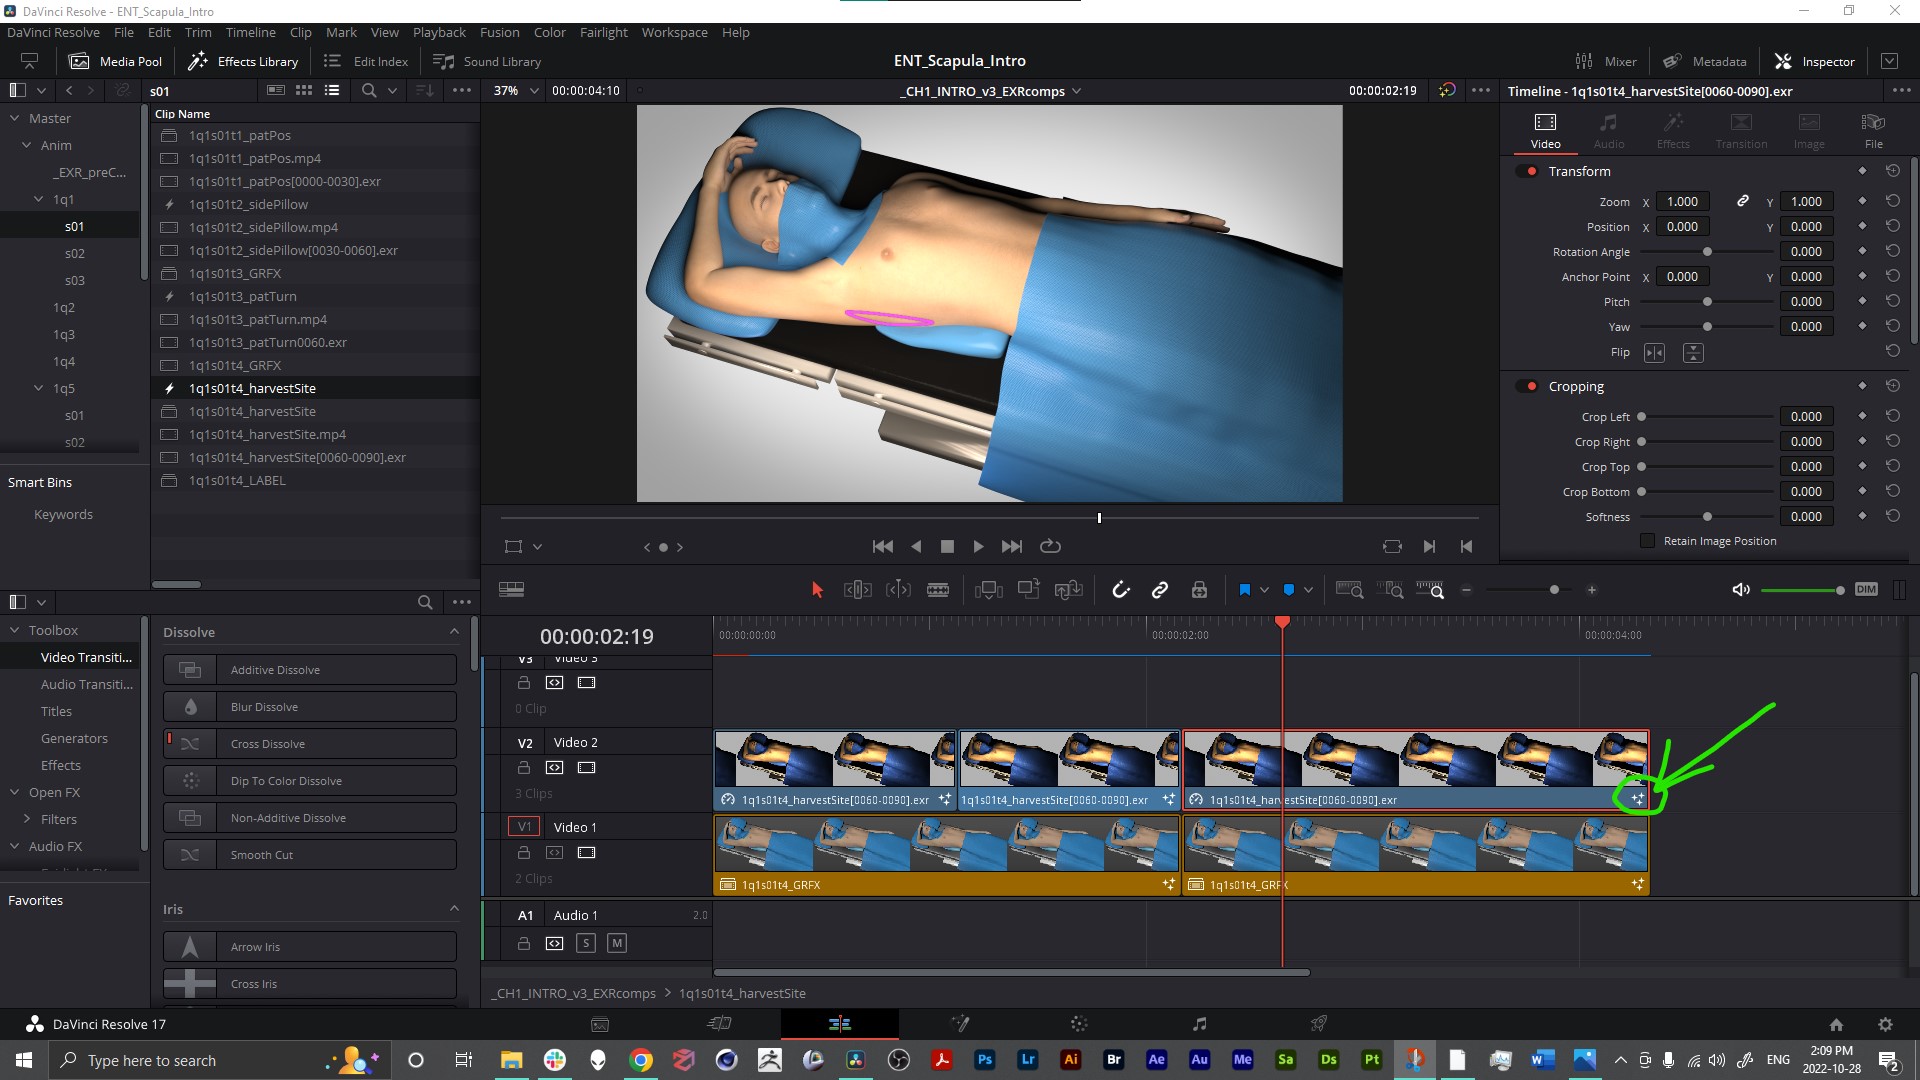
Later when you’re back on the Timeline and you want to see which clips have Fusion effects applied to them, you’ll notice that any clip with a 3-star icon on the lower right of it has Fusion nodes.
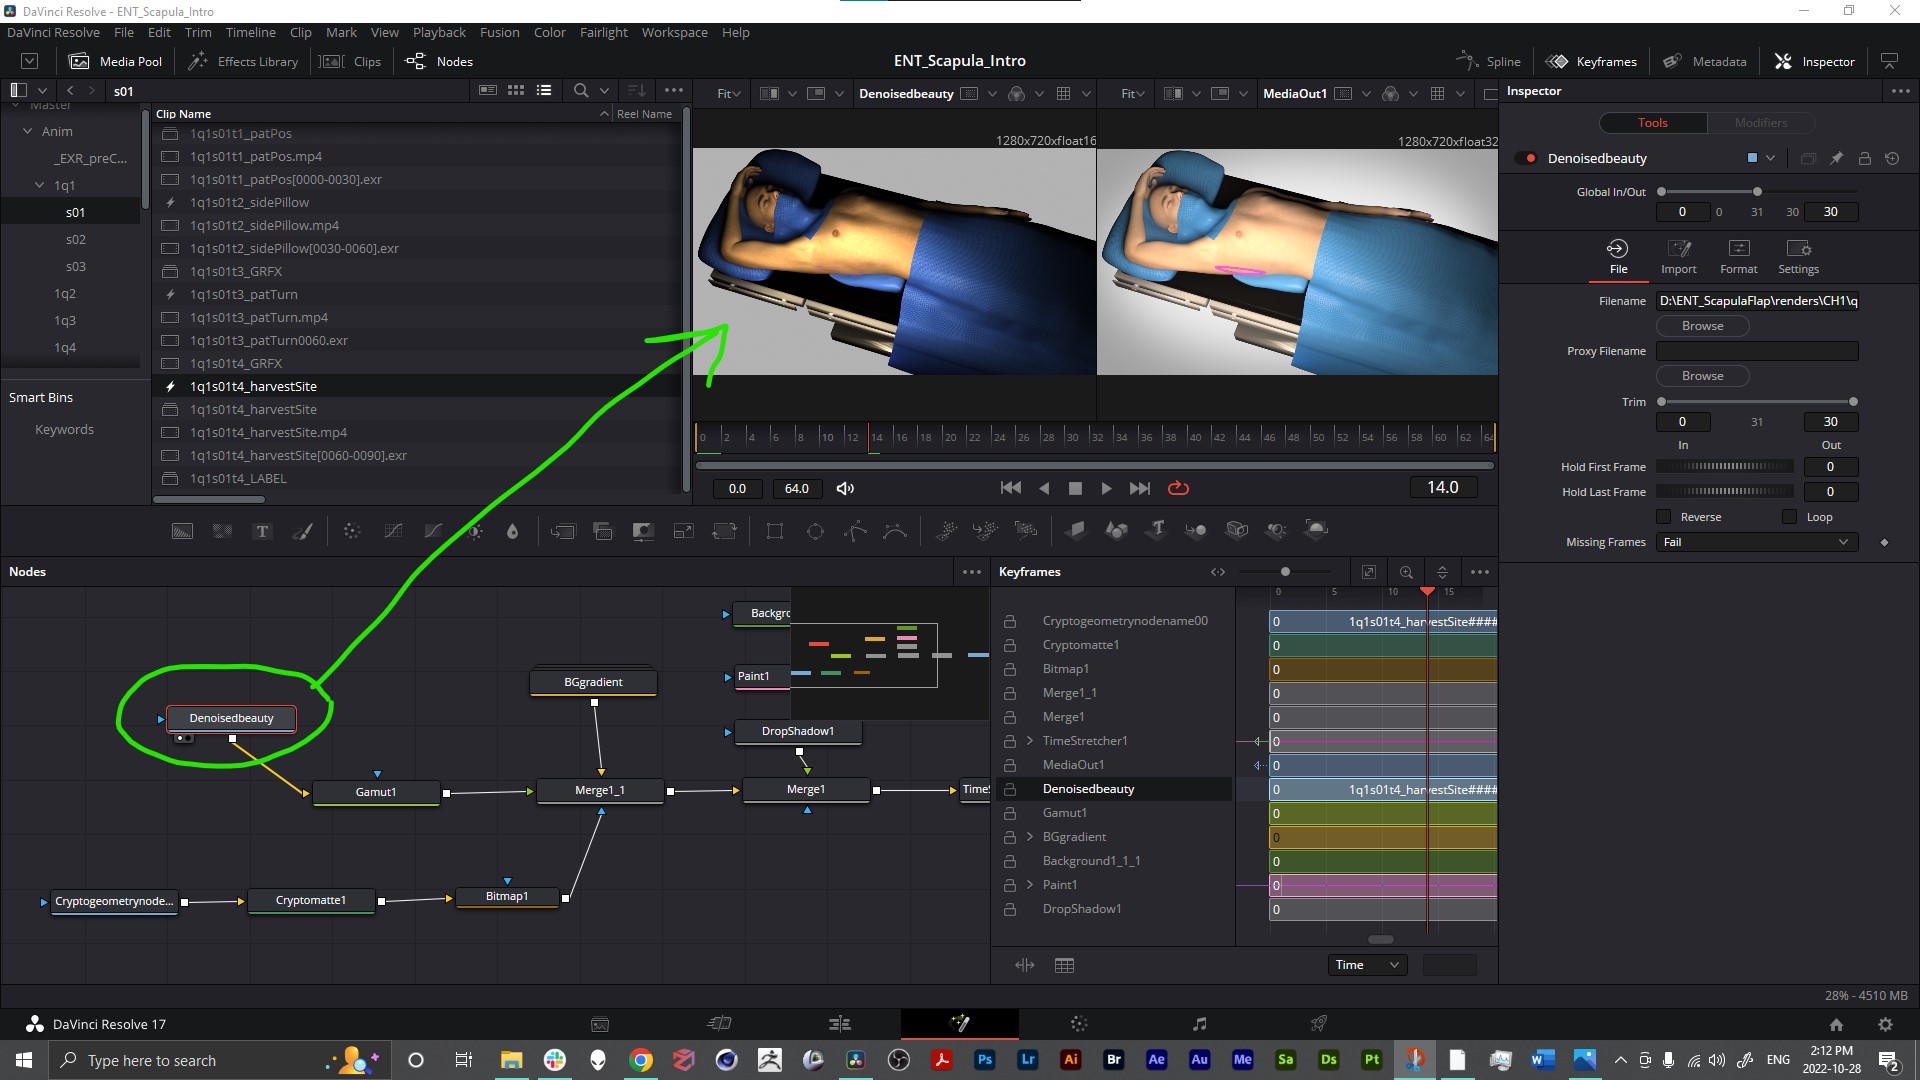
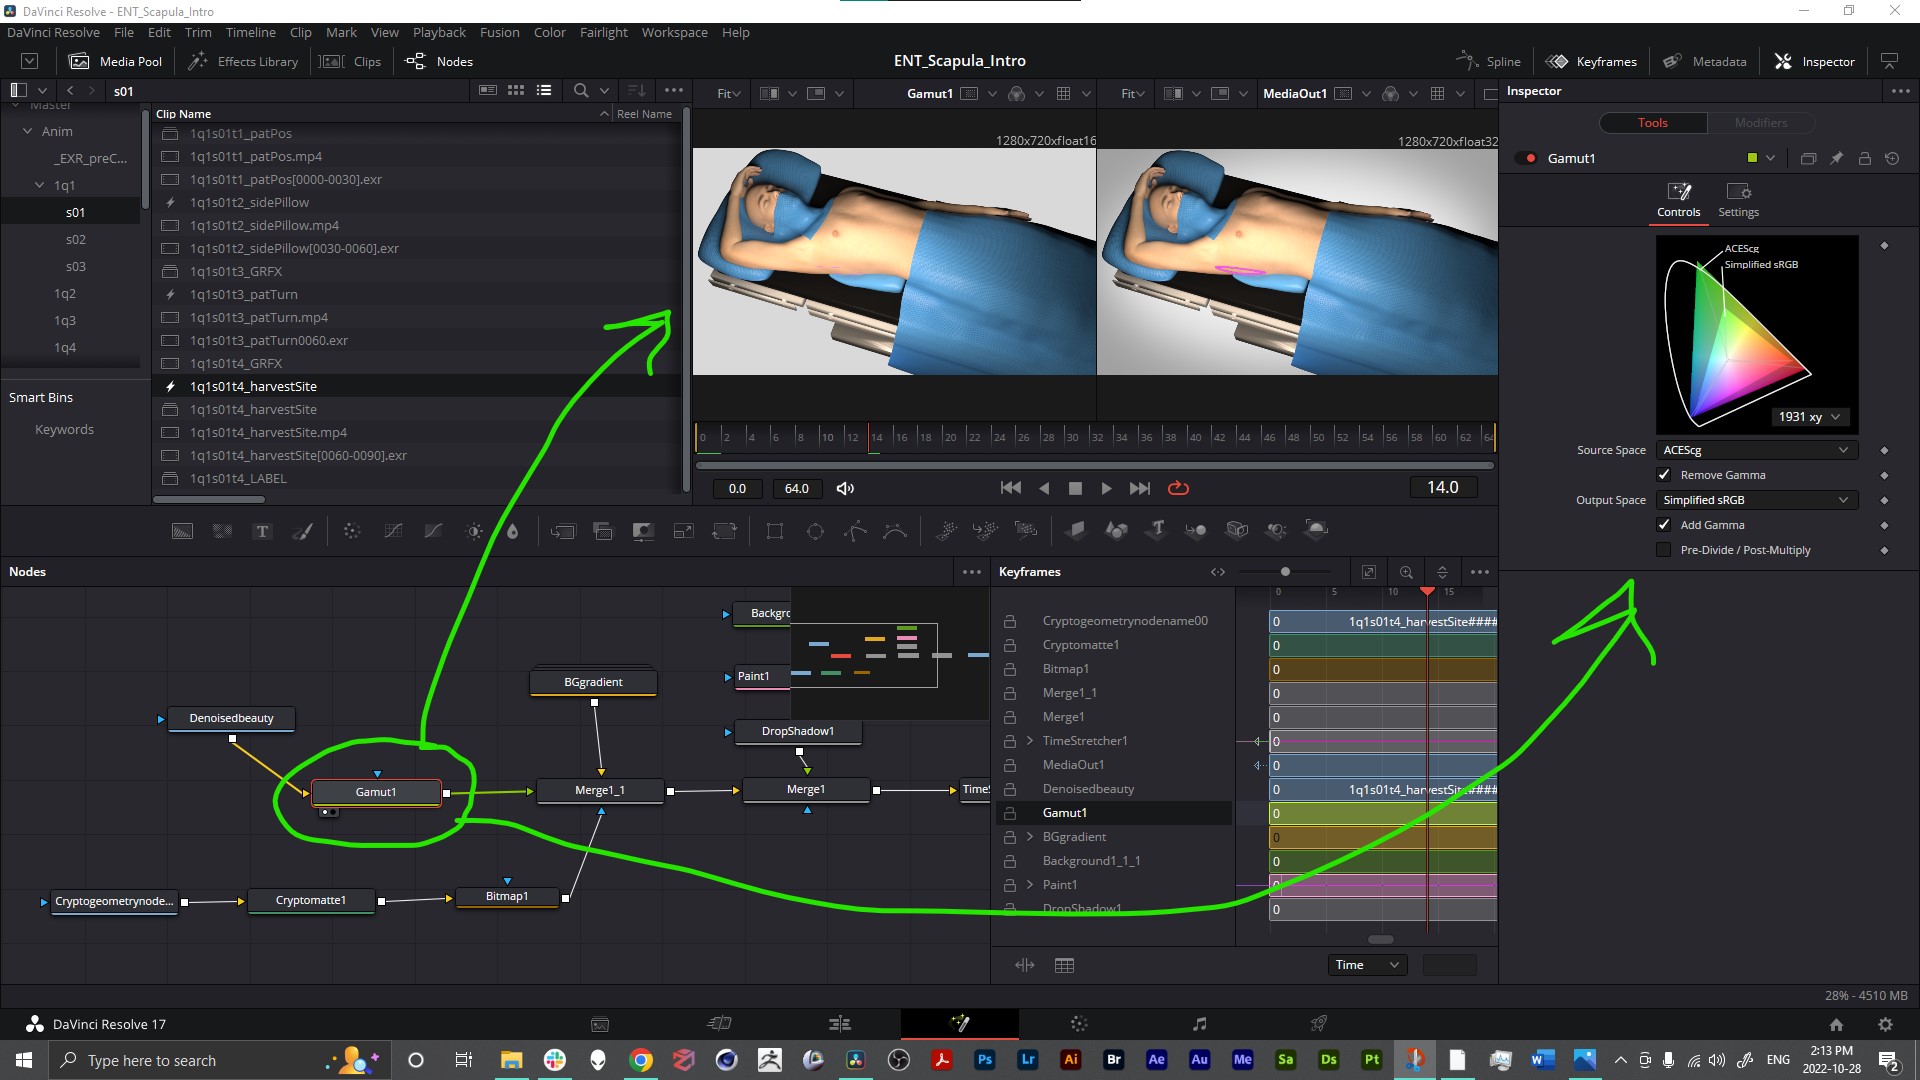
The first node in the network is the “Beauty” render pass, but in its raw state the colors look off. This is because the colorspace of the render file doesn’t match the working colorspace of the software at the moment. This is fixed by applying a “Gamut” color correction node.
To apply a custom background, a separate render pass was rendered out with some additional flexibility to make a “matte” for any specific object in the shot. Here’s what that mat pass looks like if just that node is isolated:
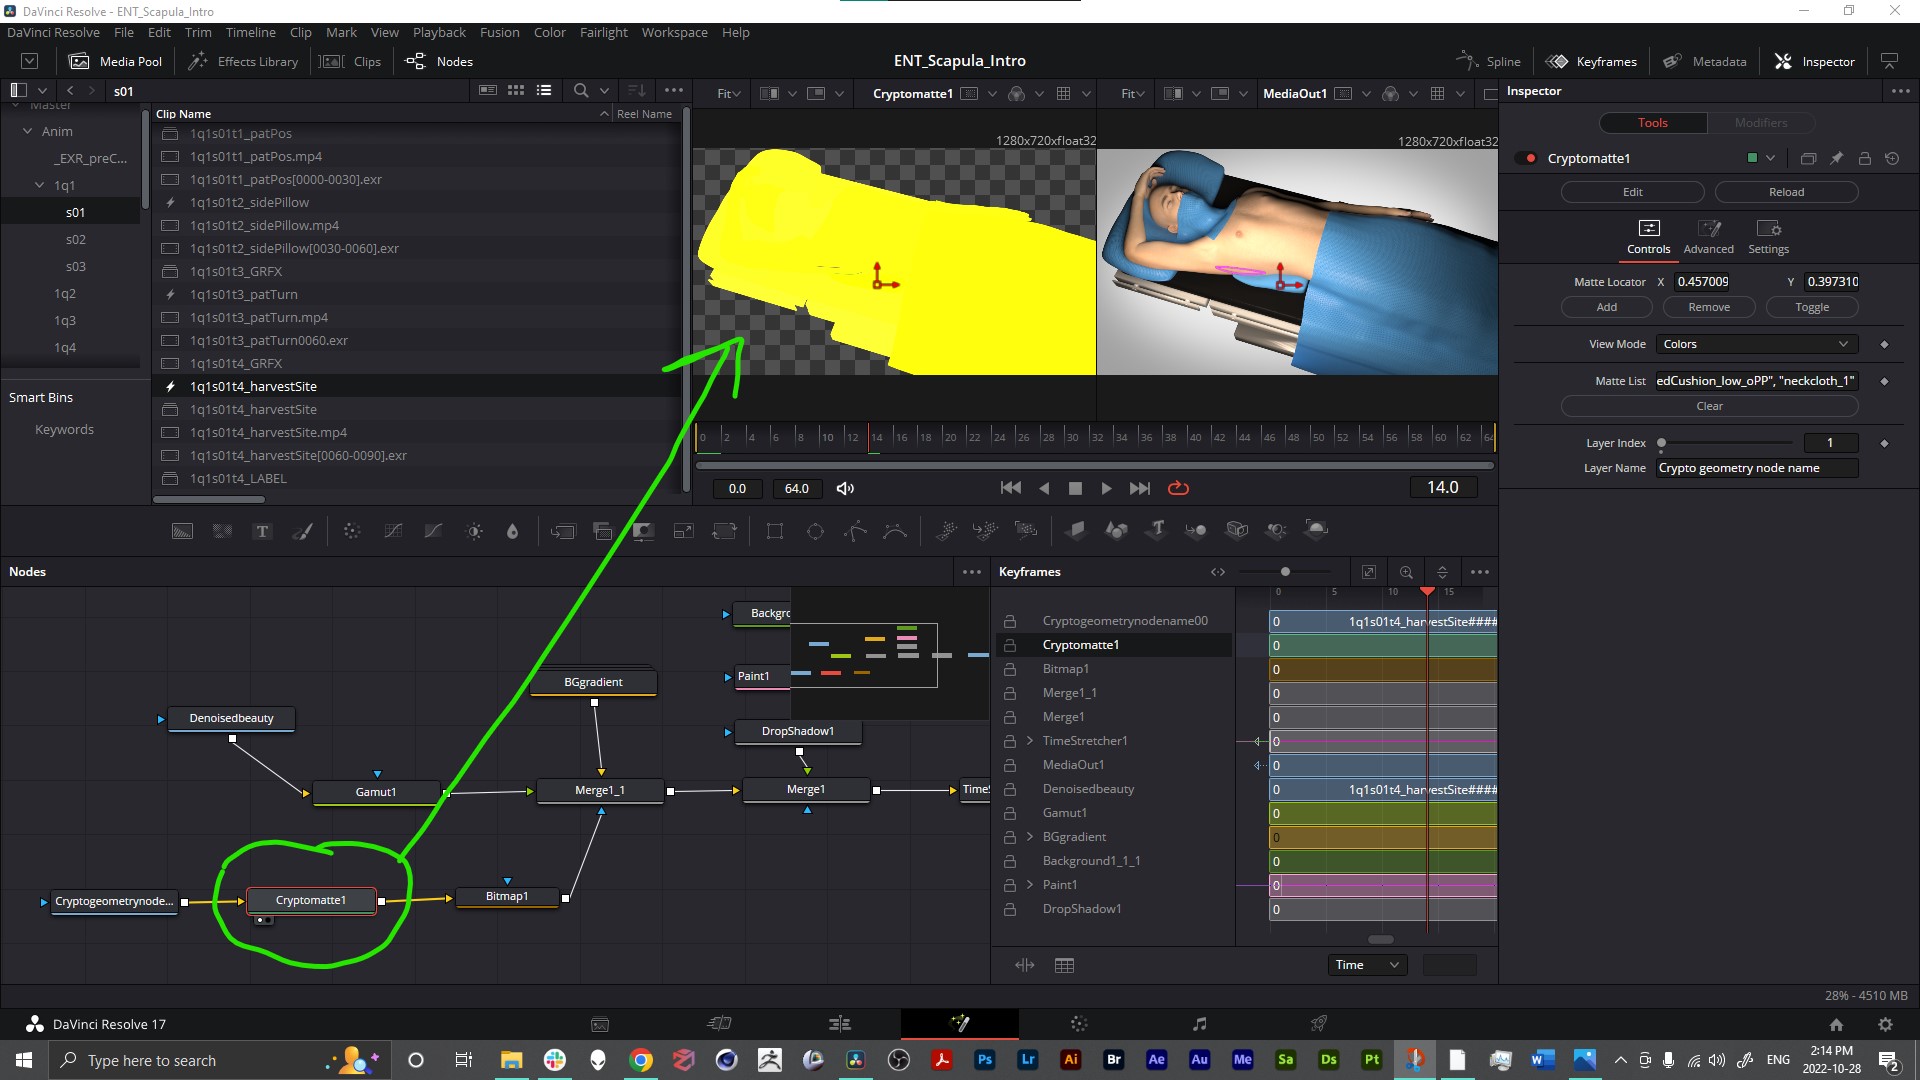
The yellow matte acts as a mask for just the main objects, while the checkerboard space behind it indicates that the area is now transparent, and a new background can be placed behind the 3D render of the patient on a surgical bed.
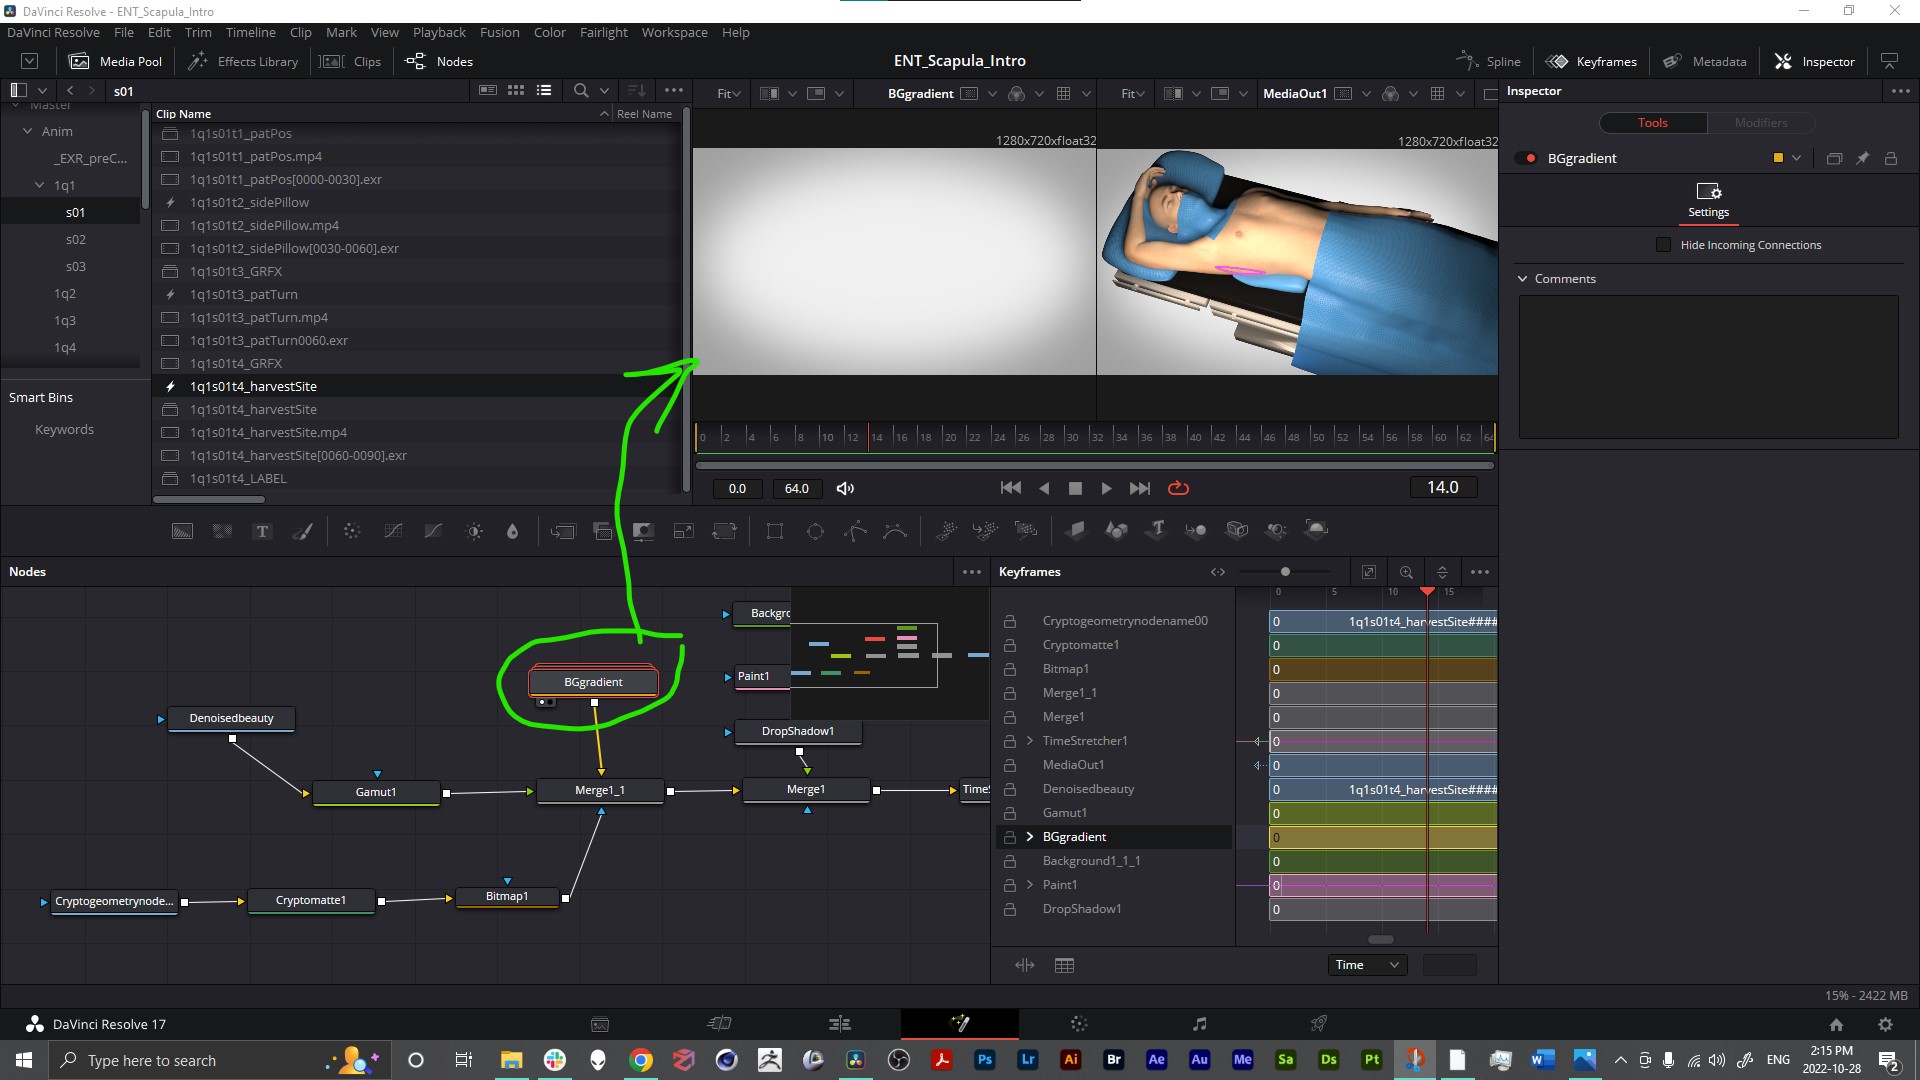
A custom background was made with several nodes which were then grouped.
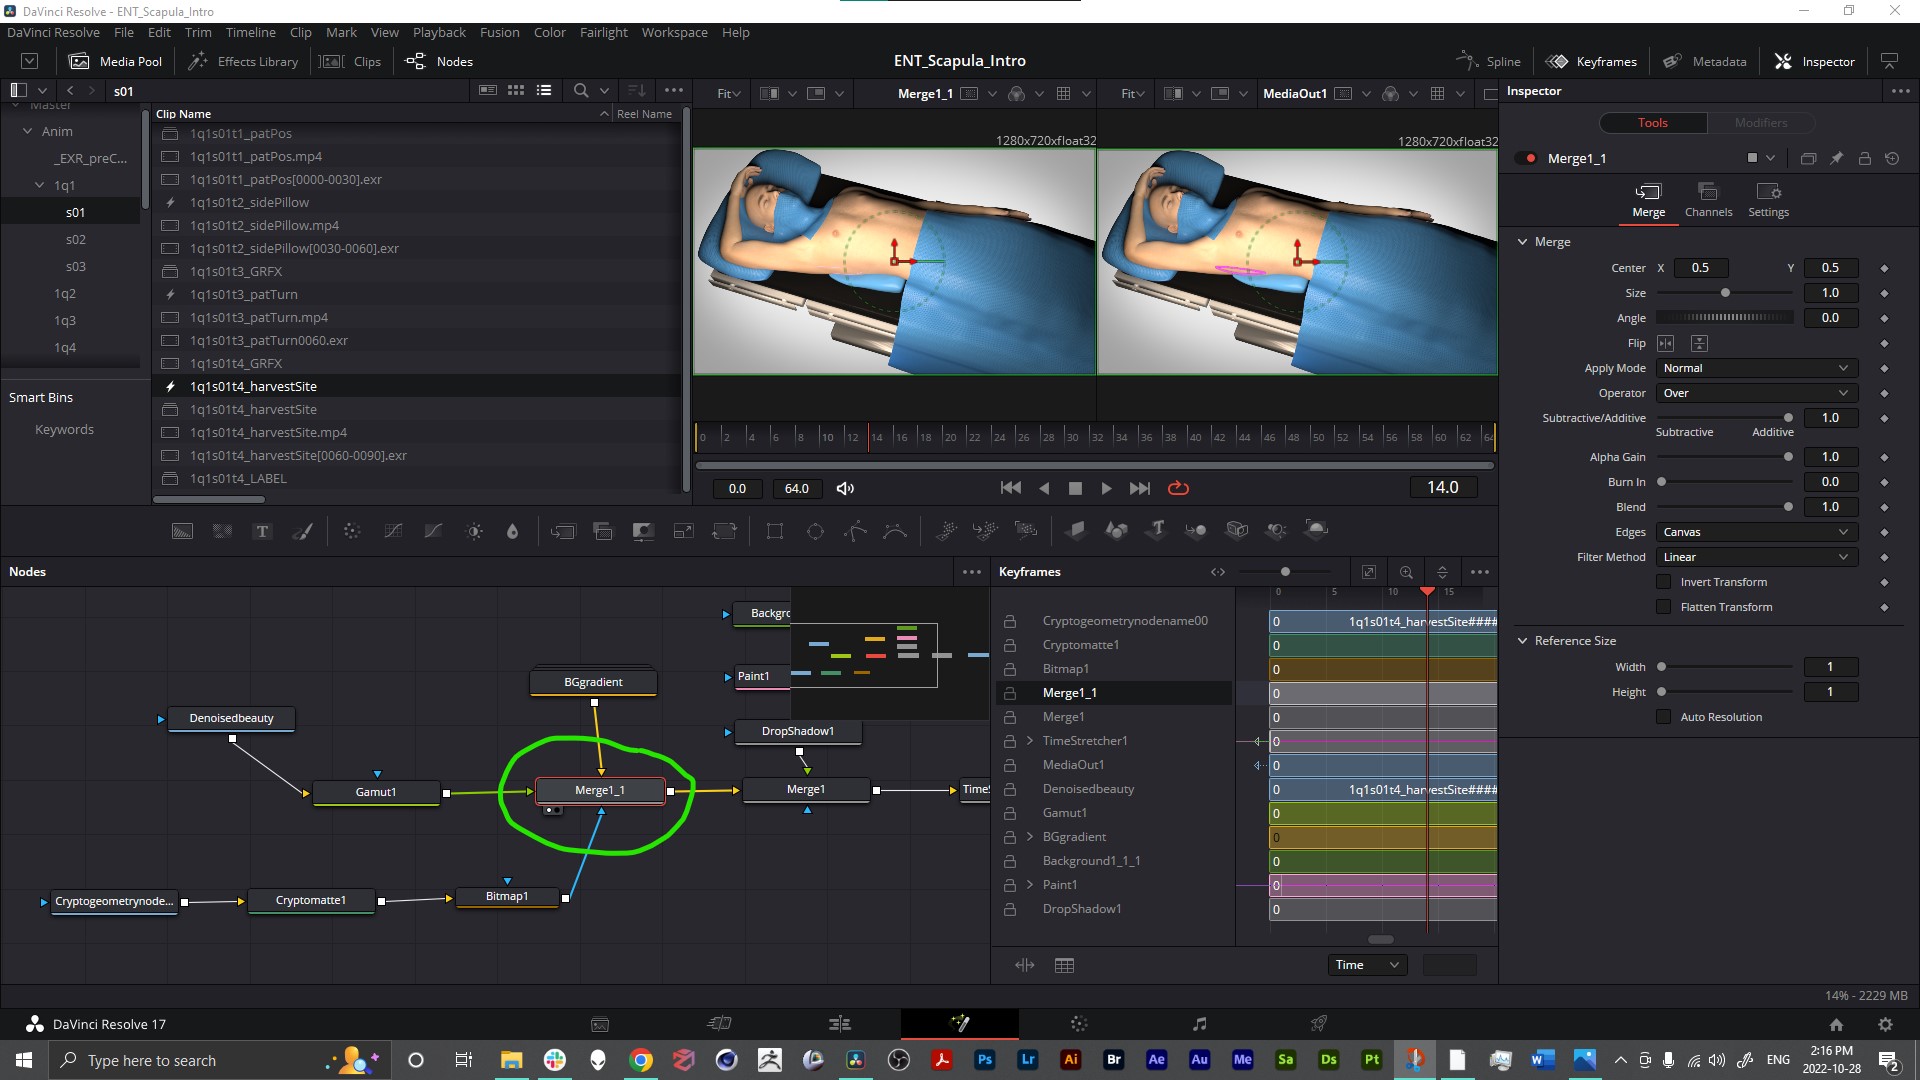
A “Merge” node was then used to combine the 3D render image sequence, the custom background and the mask.
Now let’s look at a really useful function in Fusion, which is the ability to draw and animate a line or shape on video, or 3D animation clips.
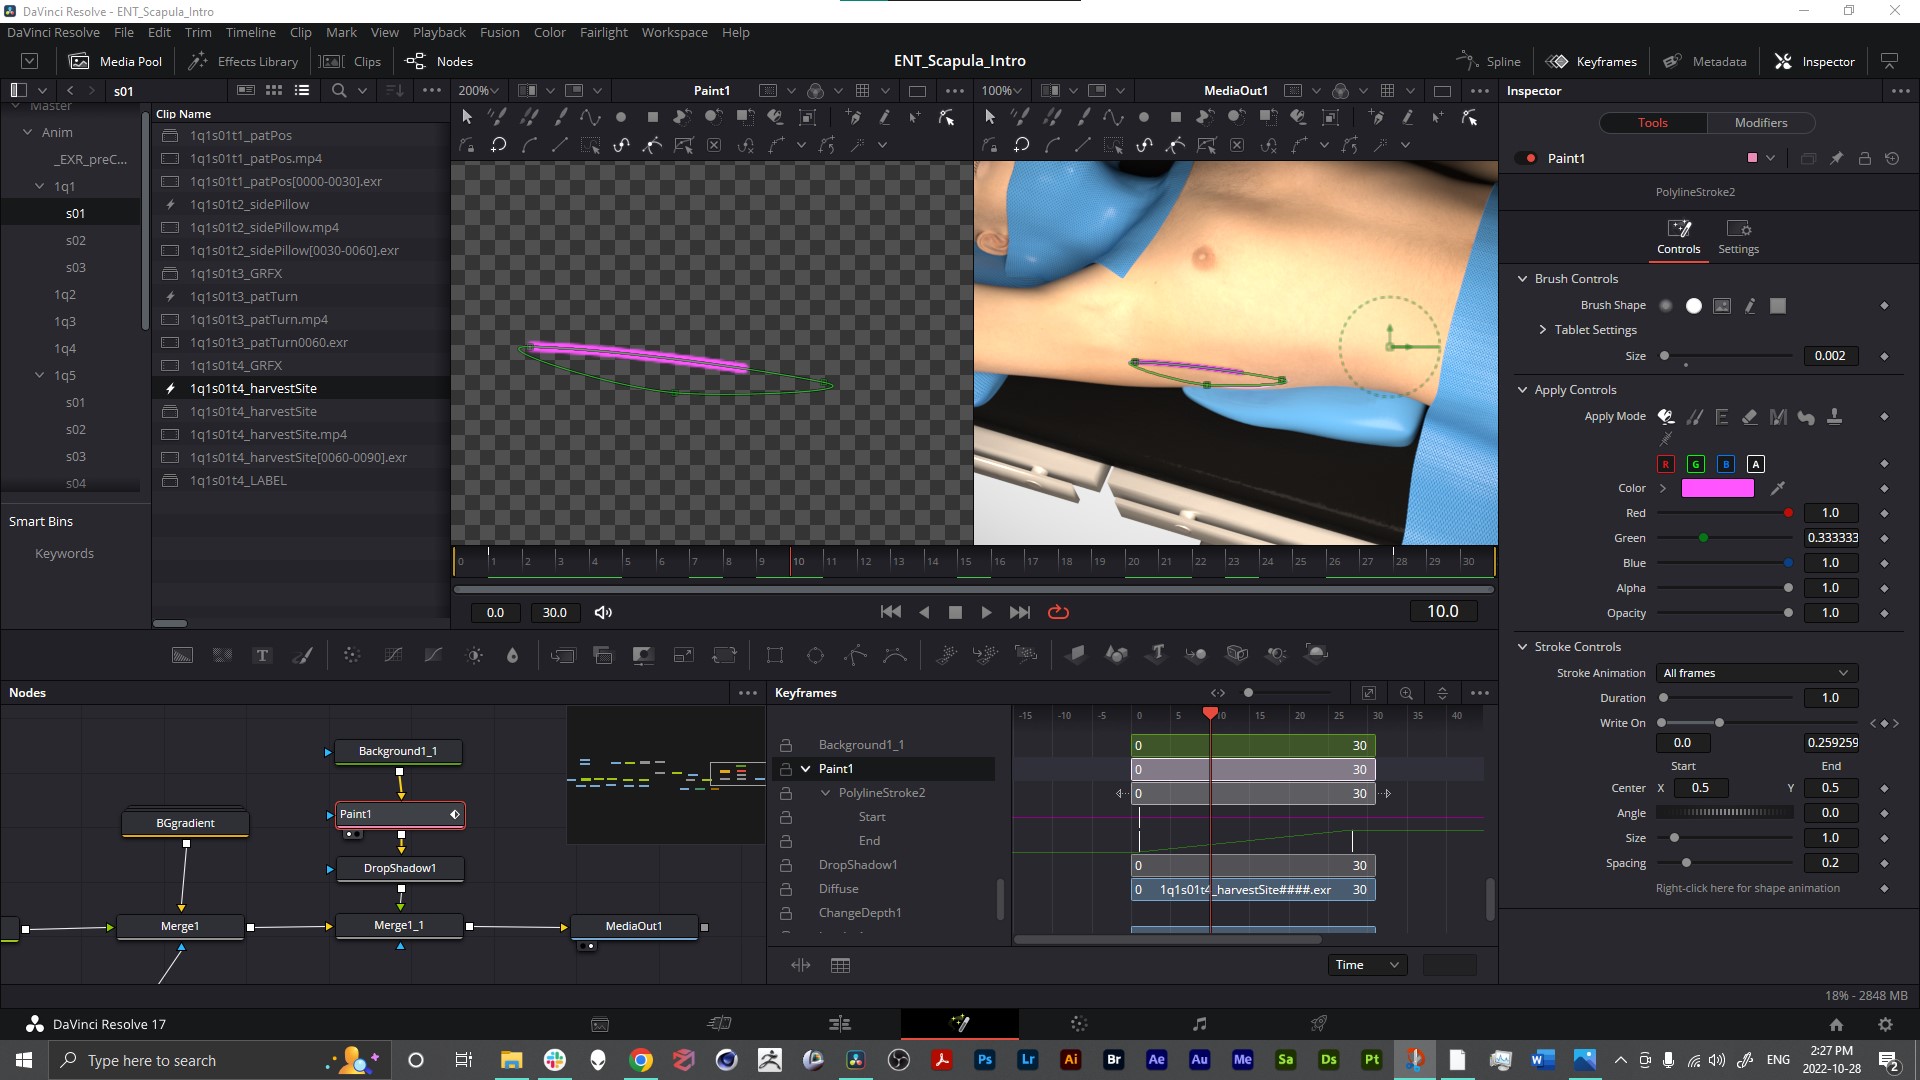
We can draw lines and shapes with the “Paint” node in Fusion. Here it’s being used to outline where a TDAP skin paddle island will be harvested.
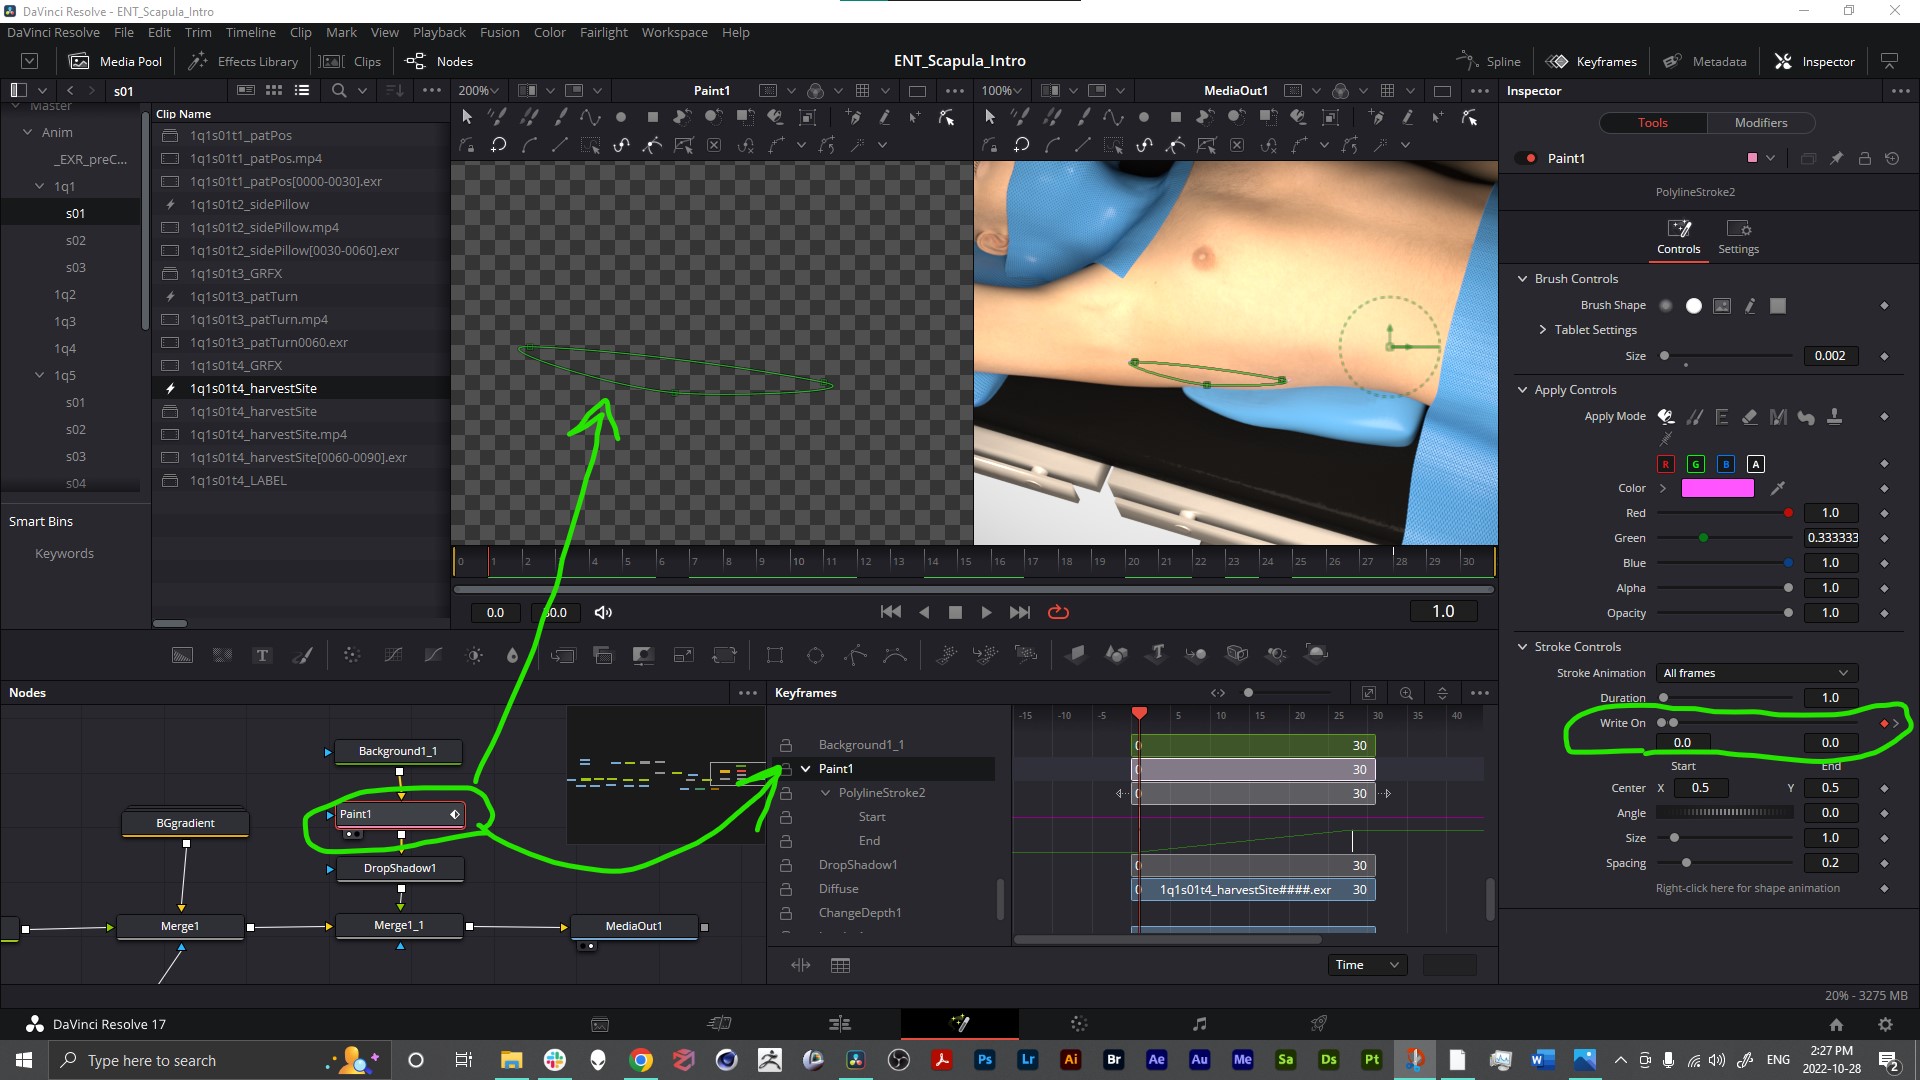
With the Paint node selected, by using the “Write On” attribute in the Inspector we can animate the outline being drawn on the image.
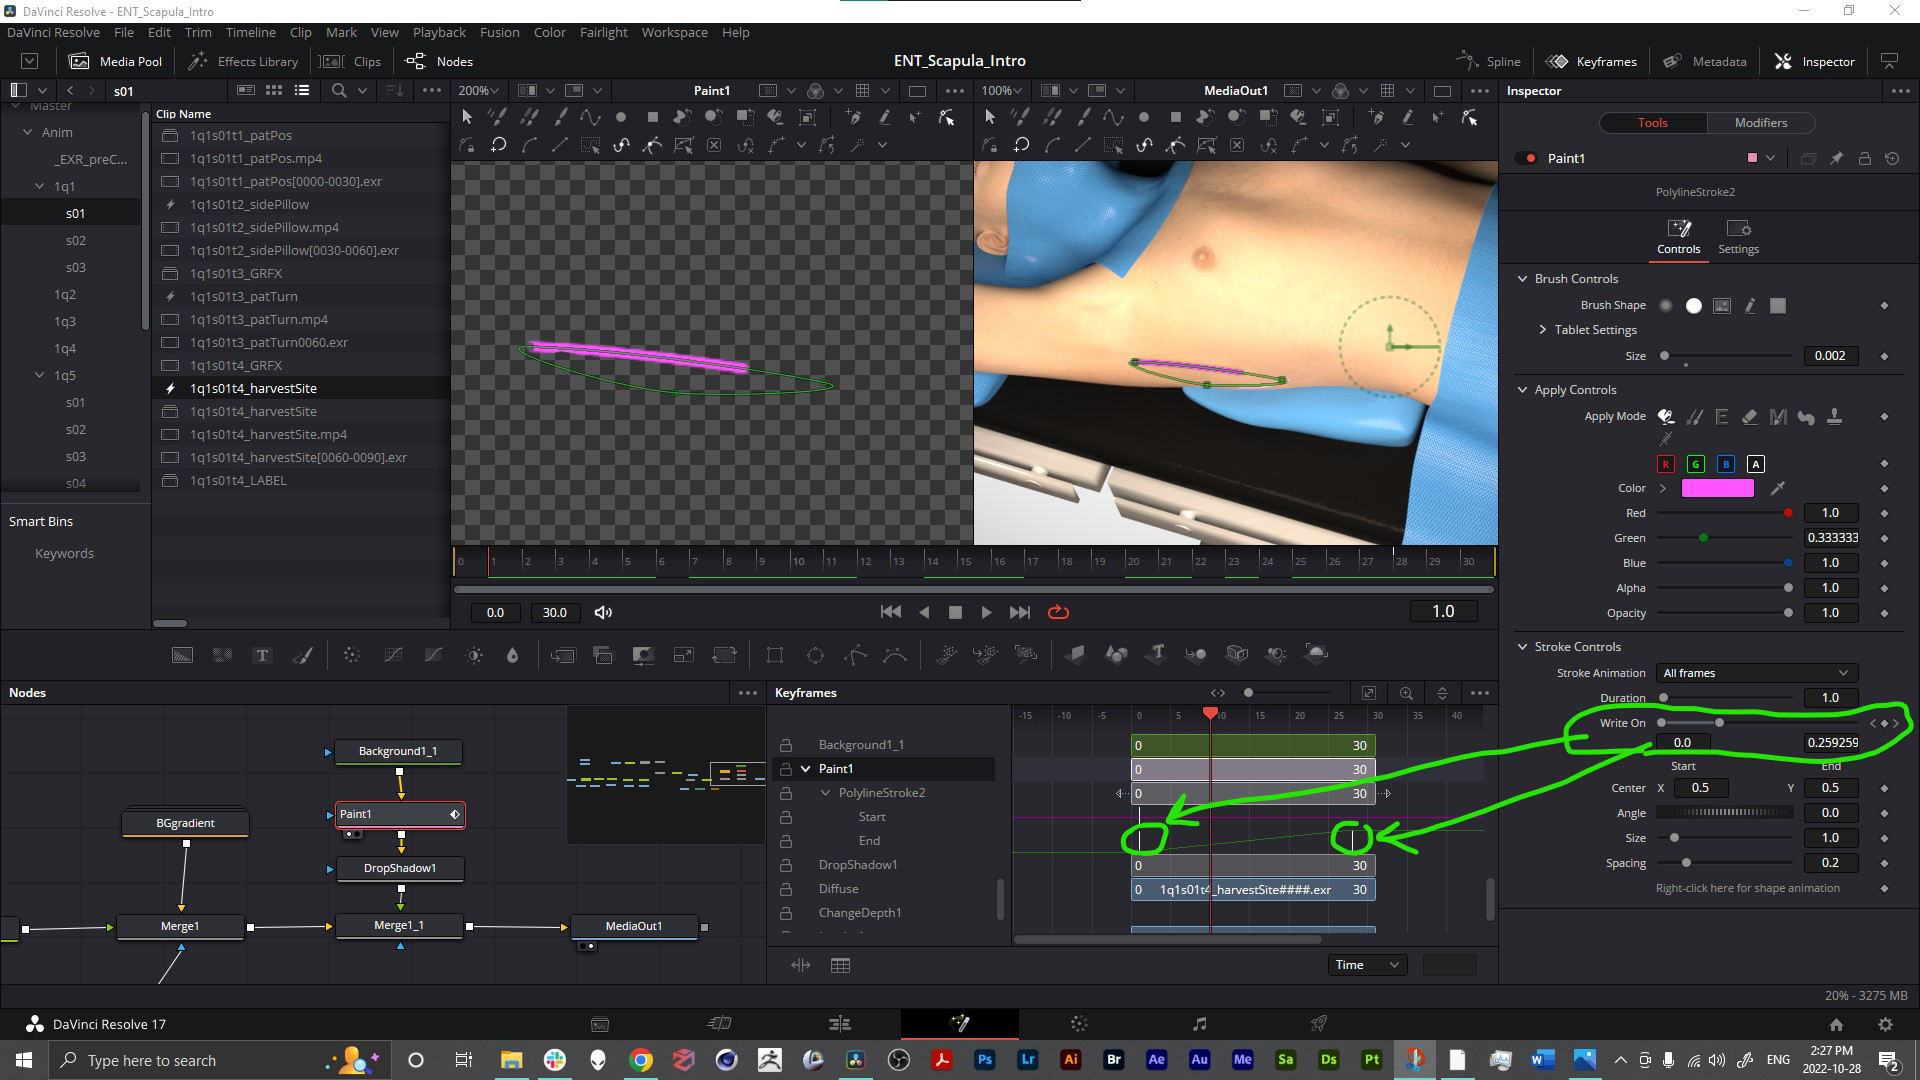
The keyframes from the “Write On”, or any other attribute we animate, will show up in the “keyframes” panel within the Fusion workspace.
Why composite 3D renders in Fusion?
Adobe After Effects (AE) is the gold standard for 3D animation compositing in the medical animation field, and if you’re using Adobe’s Creative Cloud full suite of apps, then you’d be using Premiere Pro for video editing. Blackmagic’s Fusion is combined with DaVinci Resolve, allowing you to make 3D comps and video edits in the same software.
We’ll cover compositing 3D renders in Fusion in more depth in a future blog, but for now just know it has some advantages when it comes to compositing:
- The native depth-of-field (DOF) blur effect. It functions a lot like the popular Frischluft plugin for After Effects, no weird halos on your blur, but no need to buy or even install a plugin, it's the default blur node.
- Fusion's support for the more modern and more robust ACES color space is more flexible than AE. In Fusion you can assign a color space to individual Timelines or composites, whereas with AE it's all-or-nothing. AE does support ACES, but it's a global control for the whole project.
- Node-based compositing as opposed to the layering method of AE. Nodes make re-using an effect easier, and eliminate pre-comps in many situations.
Before going any further, it’s worth sharing that Fusion has some drawbacks too. Whenever working in Fusion, you just have to keep reminding yourself of its unique benefits, then take a deep breath and try to find a work-around.
Fusion Takehomes
It’s cool to be able to composite 3D render sequences in a free piece of software that we’ve already been using quite a bit. Knowledge of DaVinci Resolve’s functions and quirks are a big help in learning and utilizing the Fusion node-based compositing.
From playing around with some simple 2D graphic effects like dashed lines for surgical cuts and some text elements, it's becoming clear that you probably could do anything in Fusion that you would otherwise do in other software. For projects that rely heavily on video with minimal graphic content, Fusion is a great tool to take advantage of.
Let us know if you’ve found our tutorial series on DaVinci Resolve and Fusion helpful, we’d love to hear if you’d like to know anything else about this awesome video editing freeware!
–TVASurg Team
