
Adobe Premiere Pro used to be our go-to video editing software, but for the past two years, we have started experimenting with DaVinci Resolve by Blackmagic Design. We find the interface to be quite intuitive. This software is packed with powerful features and it’s FREE! The free version contains most of the functions we need for our videos. They also offer a paid Studio version with added features like 4K editing. Here, we would like to share our workflow of surgical video production using DaVinci Resolve.
STEP 1: Rough Cut with Outline
After importing all raw footage, we will create a rough cut, which is a video draft that assembles all key shots in sequential order with minimum editing. In this draft, we make sure all the important surgical steps such as dividing major vessels are clearly captured. An outline of the video with key surgical steps is established and organized into digestible chapters.
The rough cut also facilitates early discussion with our content experts. It is crucial to solidify the overall picture and emphasis of the video at this early stage. There might be special techniques to demonstrate and explain through animations. We also gain a clear vision of what sections require more detail and what needs to be shortened.
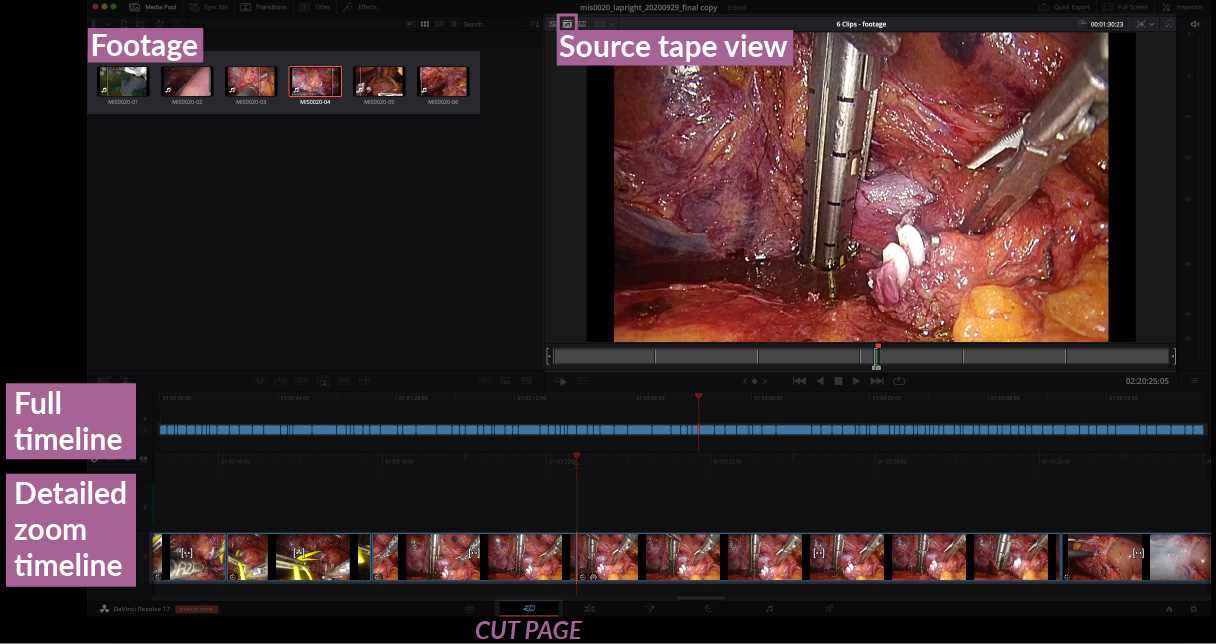
The Cut page in DaVinci Resolve is particularly suitable for creating a rough cut because the interface is optimized for quick editing. All raw footage automatically lines up in the “source tape view”, allowing for quickly scrubbing through the whole surgery and adding key shots to the timeline.
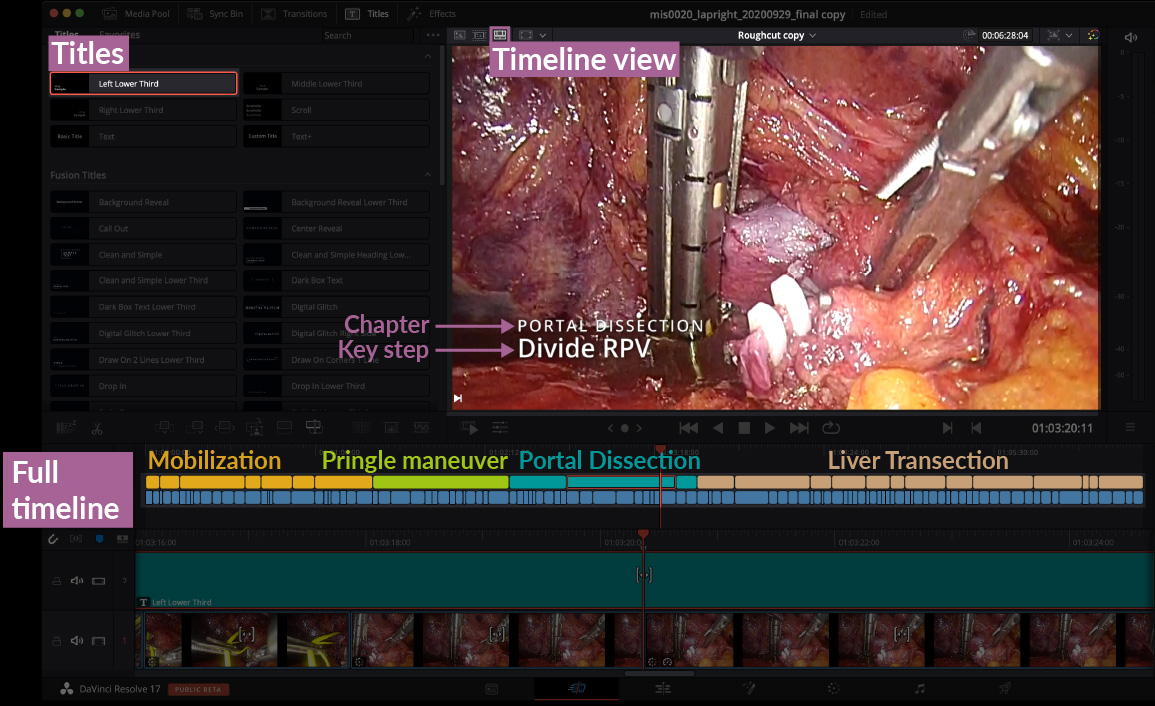
Key surgical steps and chapter headings are added to the video for review purposes. The full timeline gives an overview of the video and ensures the length of each chapter is balanced.
STEP 2: Refined Edits with Narrative Script
With the overall structure of the video confirmed, a narrative script is created to describe the surgical steps, techniques and important considerations. Computer-generated narration is used to help estimate the pacing and further refine each shot. The video cut may be trimmed or extended to match the action in the narration. Subtitles are added, and framing is also adjusted to direct the viewer to areas of focus.
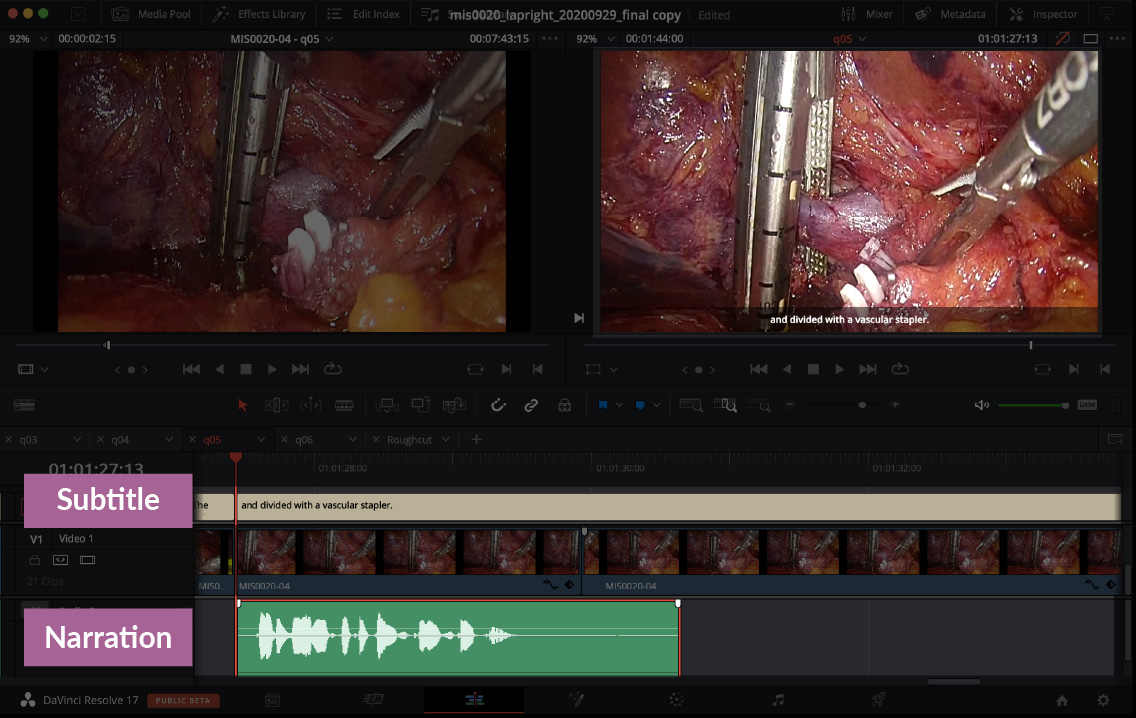
Subtitles and computer-generated narration are added to the video.
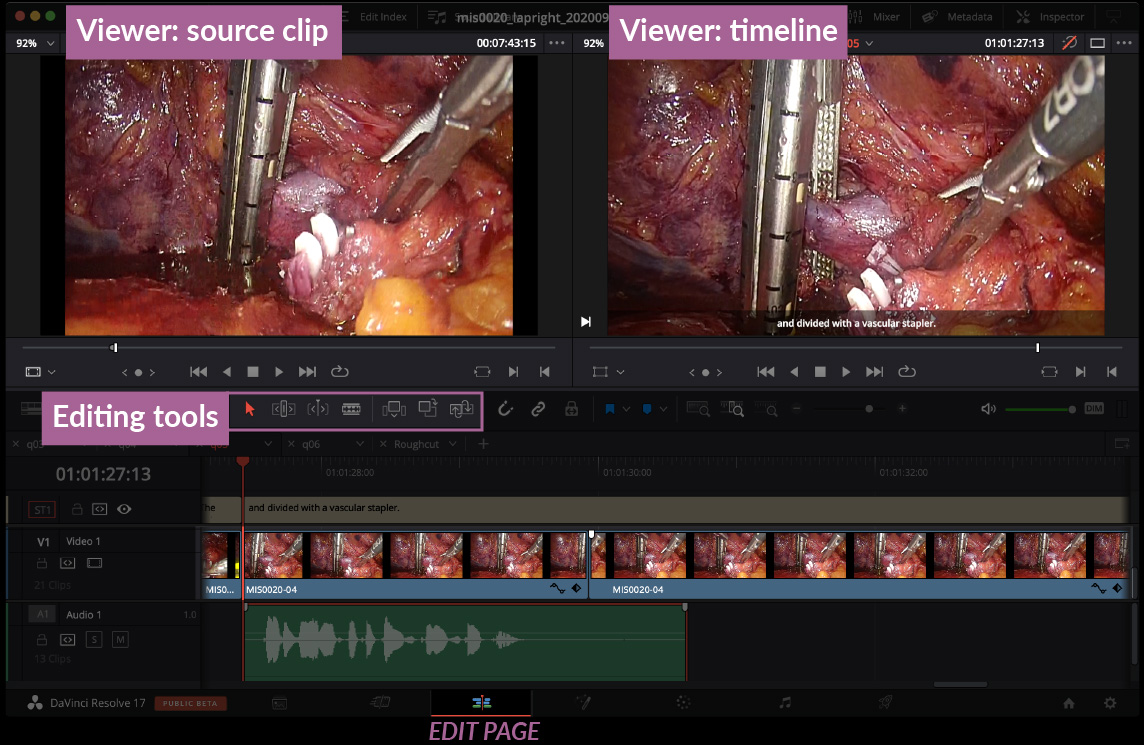
We switch to the Edit page in DaVinci Resolve for this step because the interface allows access to all the editing tools to refine the cuts. We can adjust the “in” and “out” points from the source clip and trim off the segments where no important actions happen.
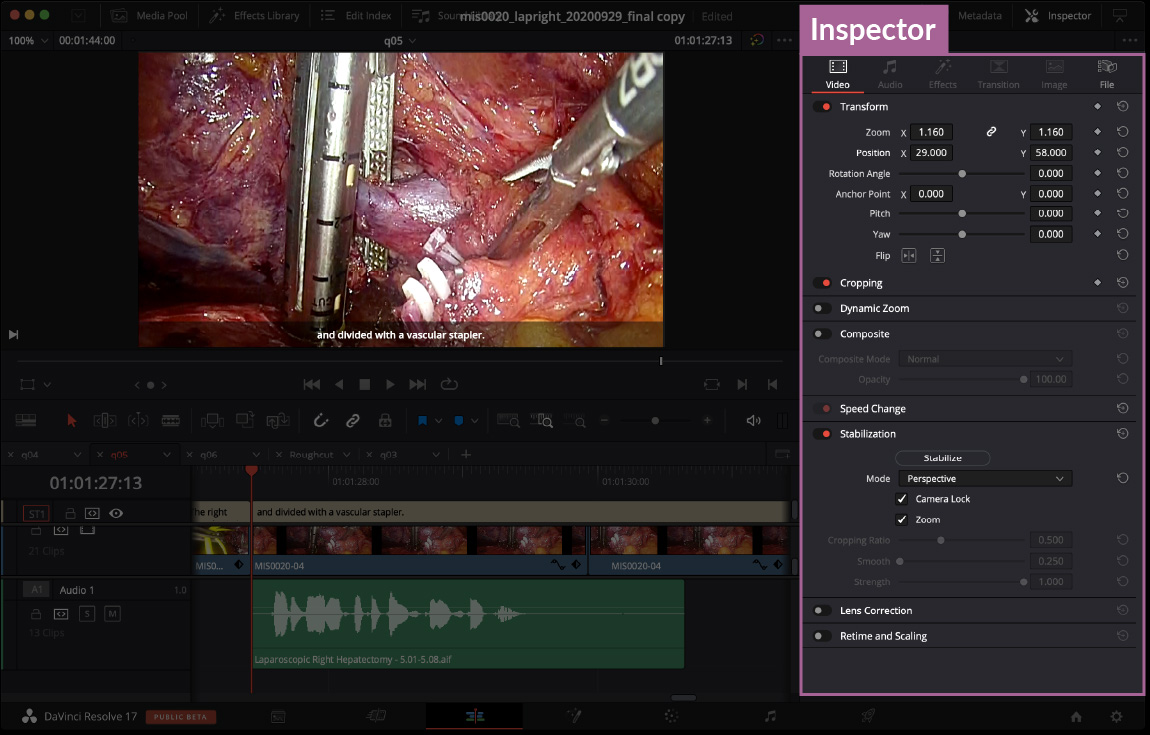
The position and zoom of the clip can be adjusted in the “inspector” to better frame the action, and the “stabilization” function can be used to quickly fix any undesired camera shake or shift.
STEP 3: Revisions and Overlays
The video clips and wording of the script are further revised. We also add labels, 3D image overlays, or animation to highlight shots where structures and actions in the footage may be unclear and would benefit from further explanation.
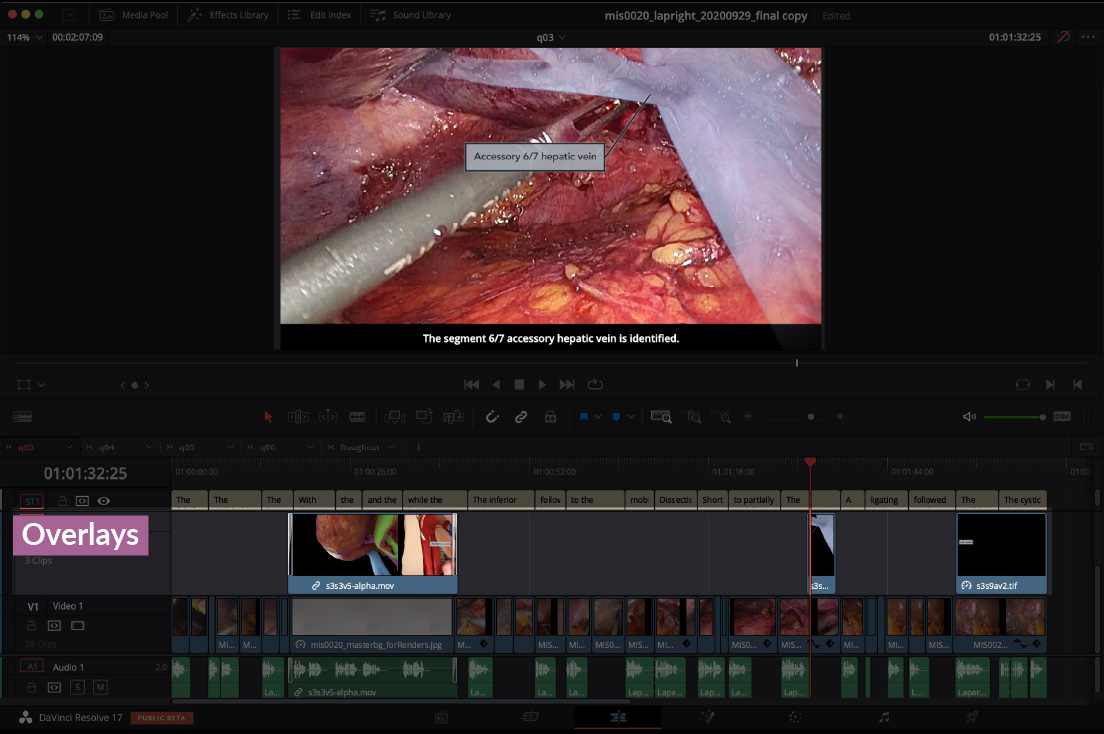
The footage is paused on a frame that best demonstrates the structure of interest. In the case shown here, an accessory 6/7 hepatic vein is dissected, but a bit difficult to recognize, so we use a 3D overlay image to show its branching from the inferior vena cava. Overlay images are created using Cinema 4D and rendered with transparent background, so it can be faded in and out from the shot later in compositing.
STEP 4: Final Narration
Once the video and the narrative script are finalized, a voice-over is recorded and cleaned up to replace the computer-generated voice. Recording narration in a later stage allows for a more flexible and iterative video editing process. Since we set the speech rate of the computer-generated voice similar to our narrator’s speed, the replacement doesn’t require any major adjustment to the length of each shot.
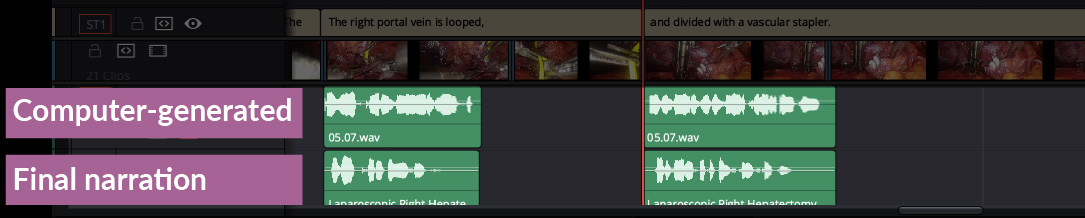
The final narration is added to the video to replace the computer-generated voice.
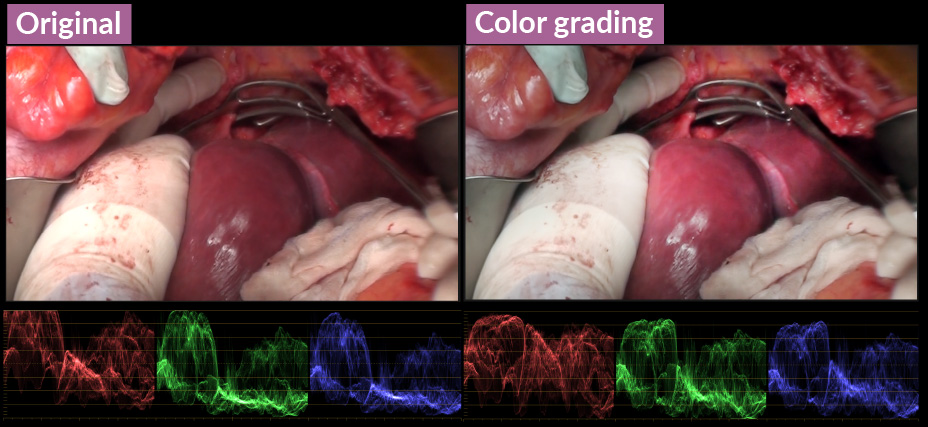
STEP 5: Color Grading
Lastly, the color, light, and contrast of the video are adjusted to enhance the image quality. The goal is to clarify anatomical structures and accentuate important actions in the shot.
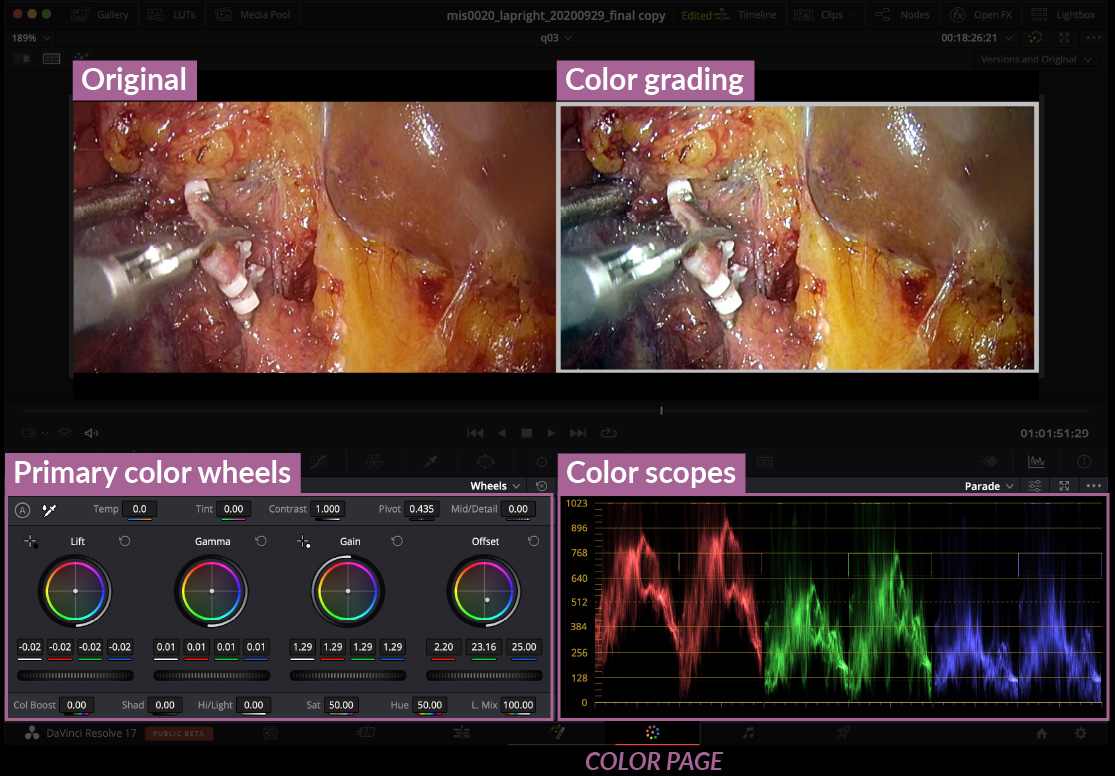
Color grading is done in the Color page in DaVinci Resolve. We use the primary color wheels to adjust color balance, brightness and contrast with reference to the color scopes. In the above image, the original footage is a little bit red (as can be seen by the stronger values in the red scope), so we shift the color balance to make the structures more clear.
In situations when the lighting in the shot is not ideal, we can also modify it to help reorient the viewers to important actions. A mask can be created around the area of interest to increase the brightness and saturation and dim the surrounding area that is less important.
As always, stay safe.
The TVASurg team